The Perfect 2-Week Philippines Itinerary for First-Time US Travelers (2026 Guide)
Introduction: Why the Philippines Belongs on Your Bucket List
If you’re an American traveler dreaming of pristine beaches, friendly locals, and adventure around every corner, the Philippines deserves your attention. With over 7,000 islands, this Southeast Asian gem offers experiences that range from swimming in crystal-clear lagoons to exploring historic Spanish colonial architecture.
As a US traveler, you’ll find the Philippines surprisingly accessible. English is widely spoken, the currency exchange works in your favor, and Filipinos are known for their genuine warmth toward American visitors. In fact, the United States consistently ranks as the second-largest source of tourists for the Philippines, with nearly 900,000 Americans visiting in 2025 alone.
This guide walks you through the perfect two-week itinerary designed specifically for first-time US travelers. No unrealistic suggestions, just practical, real-world advice based on what actually works for Americans with limited vacation time.
Recommended Travel Items for Your Trip
Before You Go: Essential Planning for US Travelers
Visa Requirements for US Citizens
Here’s the good news: US citizens can enter the Philippines visa-free for up to 30 days. Your passport must be valid for at least six months beyond your arrival date, and you’ll need proof of an onward or return ticket. If you fall in love with the country and want to stay longer, you can extend your visa at the Bureau of Immigration for up to 59 days at a time.
When to Visit: Timing Your Trip Right
The Philippines has two distinct seasons that should shape your planning:
| Season | Months | What to Expect |
| Dry Season (Peak) | January to early April | Best weather, calm seas, clear skies, festive energy |
| Summer (Shoulder) | March to May | Hotter temperatures, fewer crowds, prices begin dropping |
| Wet Season (Off-Peak) | June to October | Occasional rain (rarely all day), lush landscapes, and best deals |
| Golden Season | November to December | Cool breezes, sunshine, building toward holiday crowds |
For first-timers wanting the best experience, January through early April is your sweet spot. The weather cooperates for island hopping, the seas are calm, and you’ll understand why this archipelago earned its paradise reputation.
Budget Reality Check: What Will This Cost?
Let’s talk money. The Philippines offers incredible value for Americans, with the cost of living averaging 57% less than in the United States. Here’s what you can expect to spend:
Daily Budget Ranges (per person):
- Backpacker style: $25-$50 (hostels, local food, public transport)
- Mid-range comfort: $50-$100 (nice guesthouses, mix of dining, some tours)
- Luxury traveler: $150-$300+ (resorts, private tours, fine dining)
Sample costs in US dollars:
- Local restaurant meal: $3-$7
- Island hopping tour: $15-$30
- Domestic flight: $20-$80 one-way
- San Miguel beer: $1-$2
- 3-star hotel: around $62/night
Money-saving tip: ATMs charge $5-$7 per withdrawal, so bring a card with no foreign transaction fees and withdraw larger amounts less frequently.
Booking Flights from the US
Direct flights from major US hubs are limited. Most routes connect through Los Angeles (LAX), San Francisco (SFO), or Honolulu (HNL) to Manila (MNL) or Cebu (CEB). Book at least 3-6 months in advance for the best rates, and avoid peak seasons like Christmas when prices can double.
Typical round-trip fares from the US range from $500 to $1,200, depending on your departure city and timing.
The Perfect 2-Week Philippines Itinerary
This itinerary balances iconic destinations with realistic travel times. You’ll cover the highlights without burning out, and every day includes practical advice based on what actually works.
Route Overview
- Days 1-2: Manila (Arrival and culture)
- Days 3-5: Coron, Palawan (Lagoons and Island Hopping)
- Days 6-8: El Nido, Palawan (Limestone Karsts)
- Days 9-11: Cebu (Waterfalls and Wildlife)
- Days 12-13: Boracay (White Beach Relaxation)
- Day 14: Manila to Home
Days 1-2: Manila – Don’t Just Transit, Explore
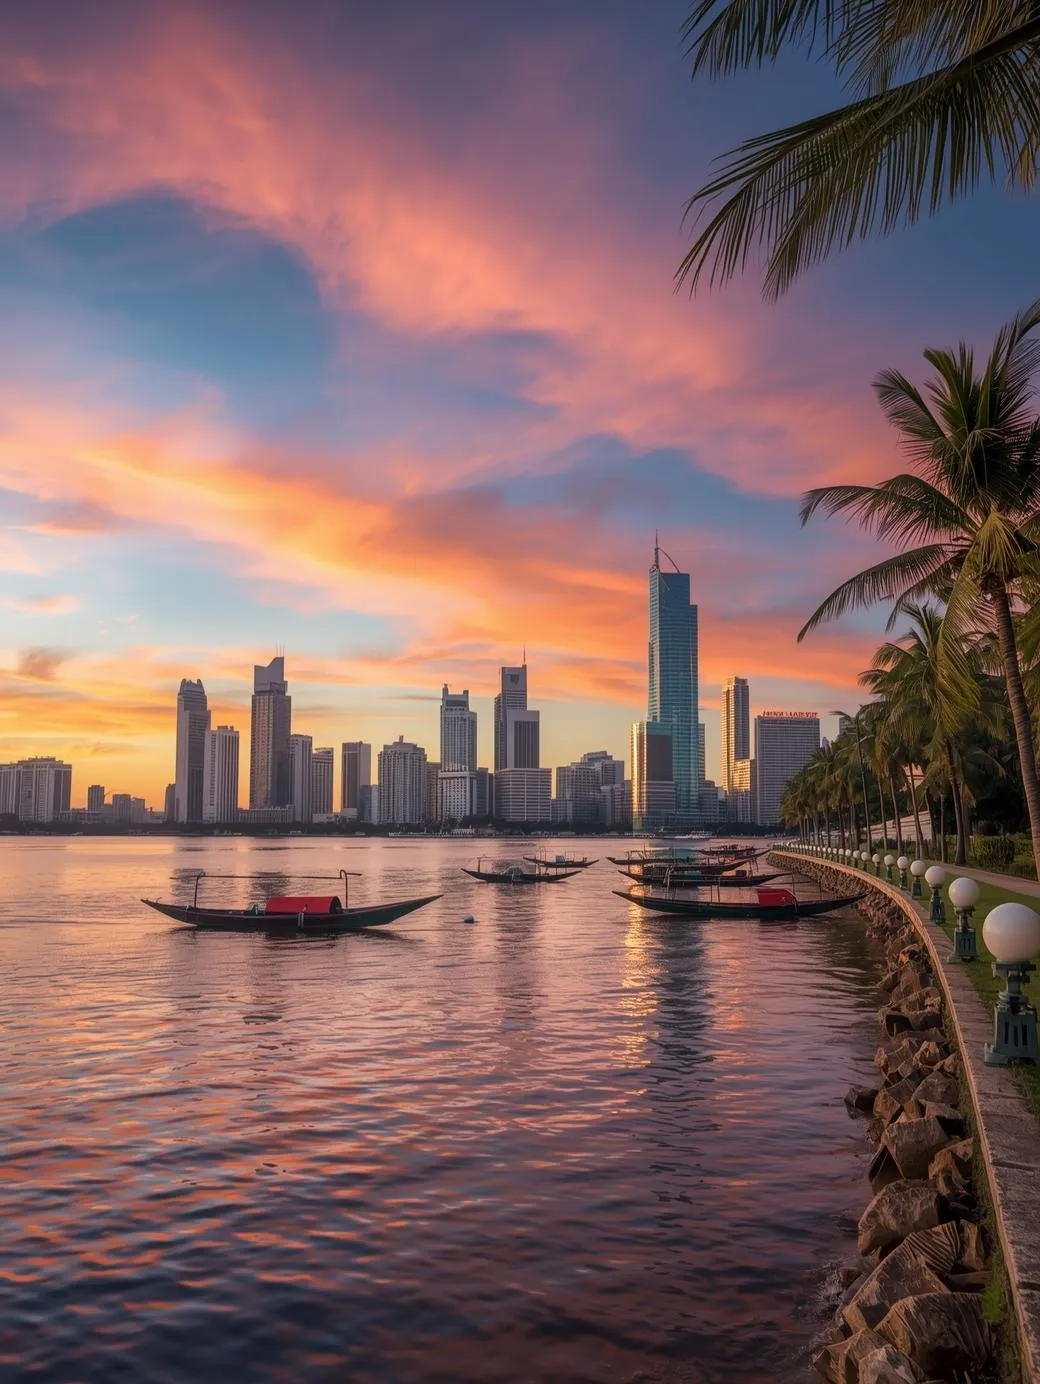
Most US flights arrive in Manila late in the day or after a long journey. Many travelers make the mistake of rushing through, but Manila deserves at least a full day.
For an effortless tour, book in advance. Check out the Manila tour programs.
Where to Stay in Manila
Choose based on your priorities:
- Intramuros area: Historic charm, walking distance to Spanish colonial sites
- Makati: Modern business district, excellent dining, nightlife
- Pasay: Close to the airport, convenient for early flights
Day 1: Arrival and Settling In
After your long flight, take it easy. If you arrive with energy, head to Rizal Park for a sunset stroll along Manila Bay. Otherwise, rest up at your hotel and prepare for tomorrow.
Practical tip: Manila traffic is notoriously unpredictable. Book a hotel with airport transfer or use official airport taxis or ride-hailing apps (Grab is the local equivalent of Uber) – they’re safer than unmetered street cabs.
Day 2: Historic Manila Immersion
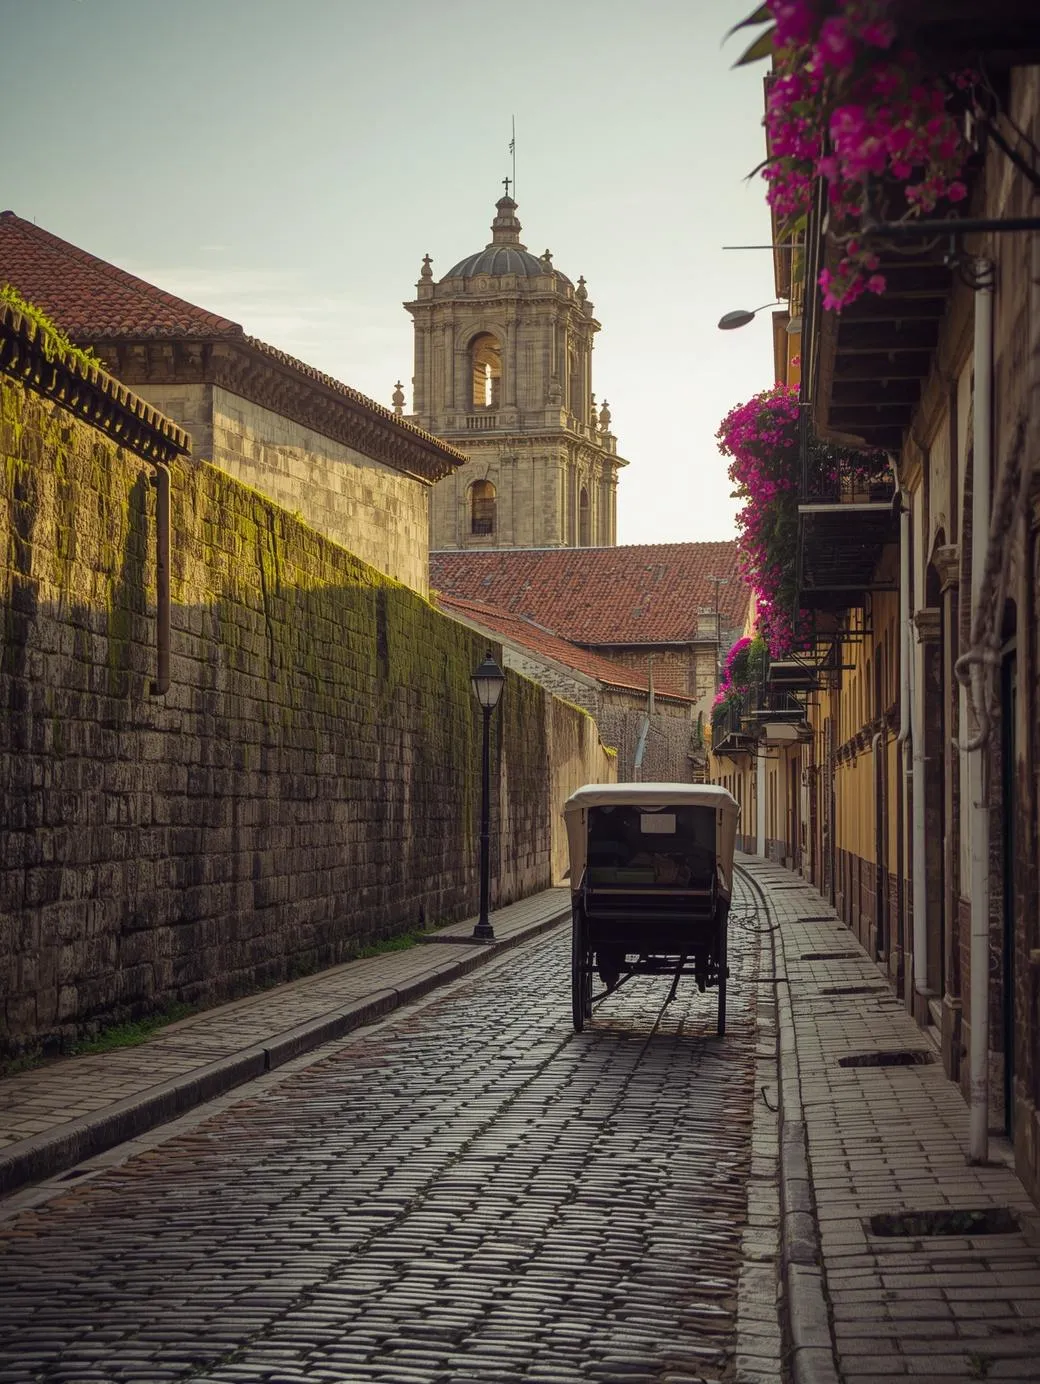
Start your day in Intramuros, the historic walled city. This is where you’ll understand the Philippines’ Spanish colonial past. Must-visit spots:
- Fort Santiago: A citadel that protected the city for centuries
- San Agustin Church: A UNESCO World Heritage site and the oldest stone church in the Philippines
- Casa Manila: A beautifully preserved colonial home
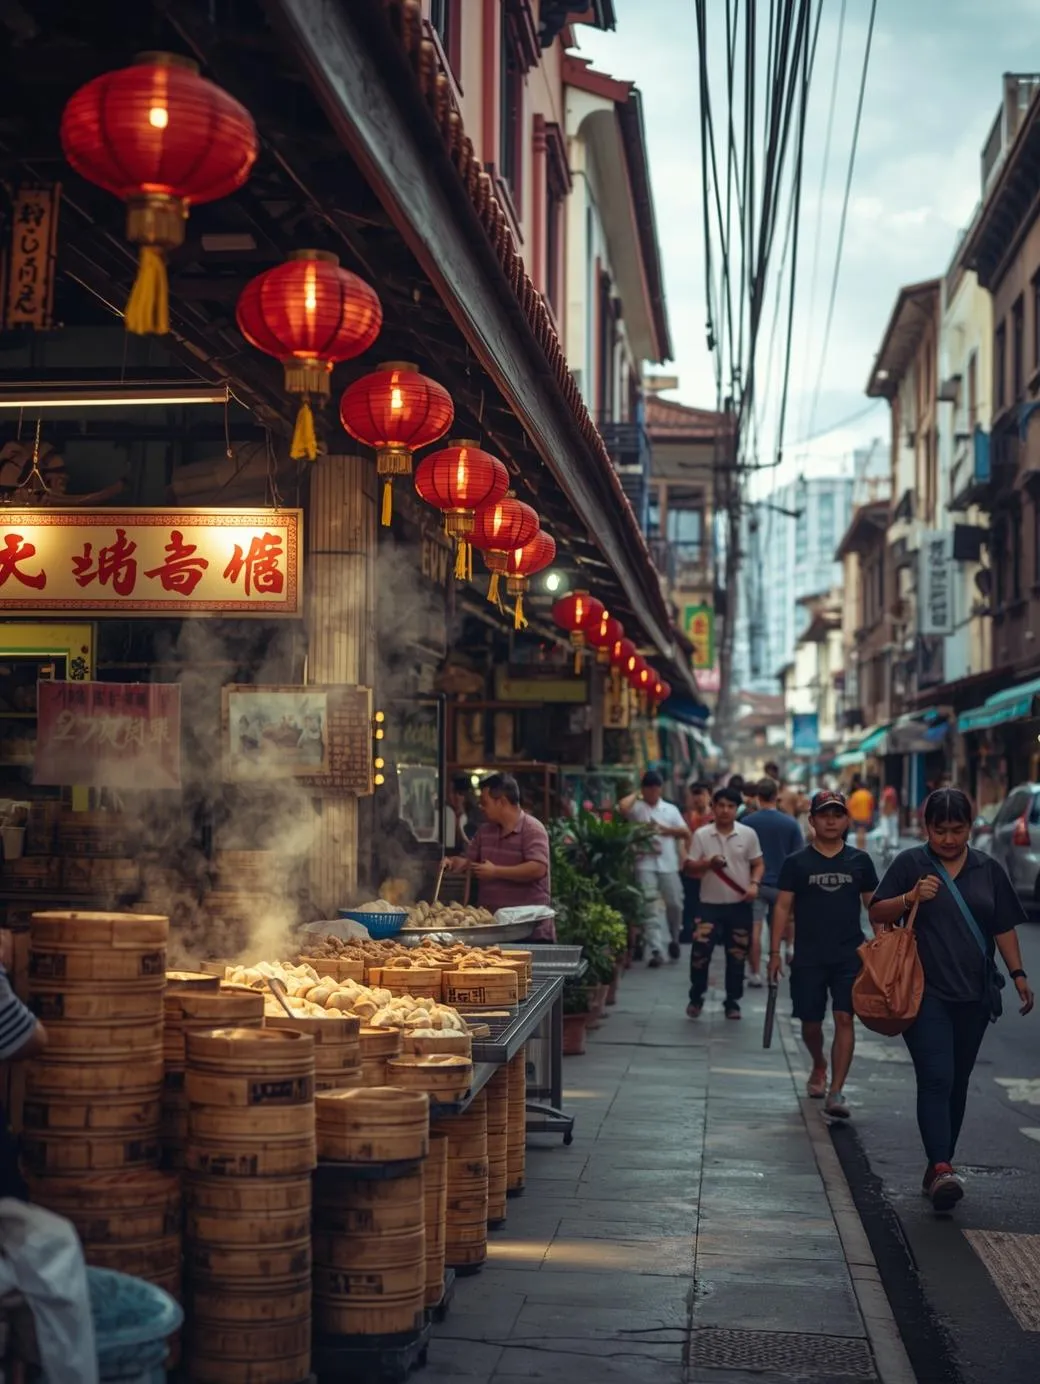
After lunch, head to Binondo, the world’s oldest Chinatown. The food scene here is incredible – join a street food tour or simply wander and sample dumplings, noodle dishes, and local favorites.
Dinner recommendation: Try authentic Filipino cuisine. Don’t miss adobo (meat braised in vinegar and soy sauce) or sinigang (tamarind-based sour soup).
Travel tip for Day 3: Book your domestic flight to Coron in advance. Allow at least 3 hours between your domestic and international connections due to terminal transfers and traffic.
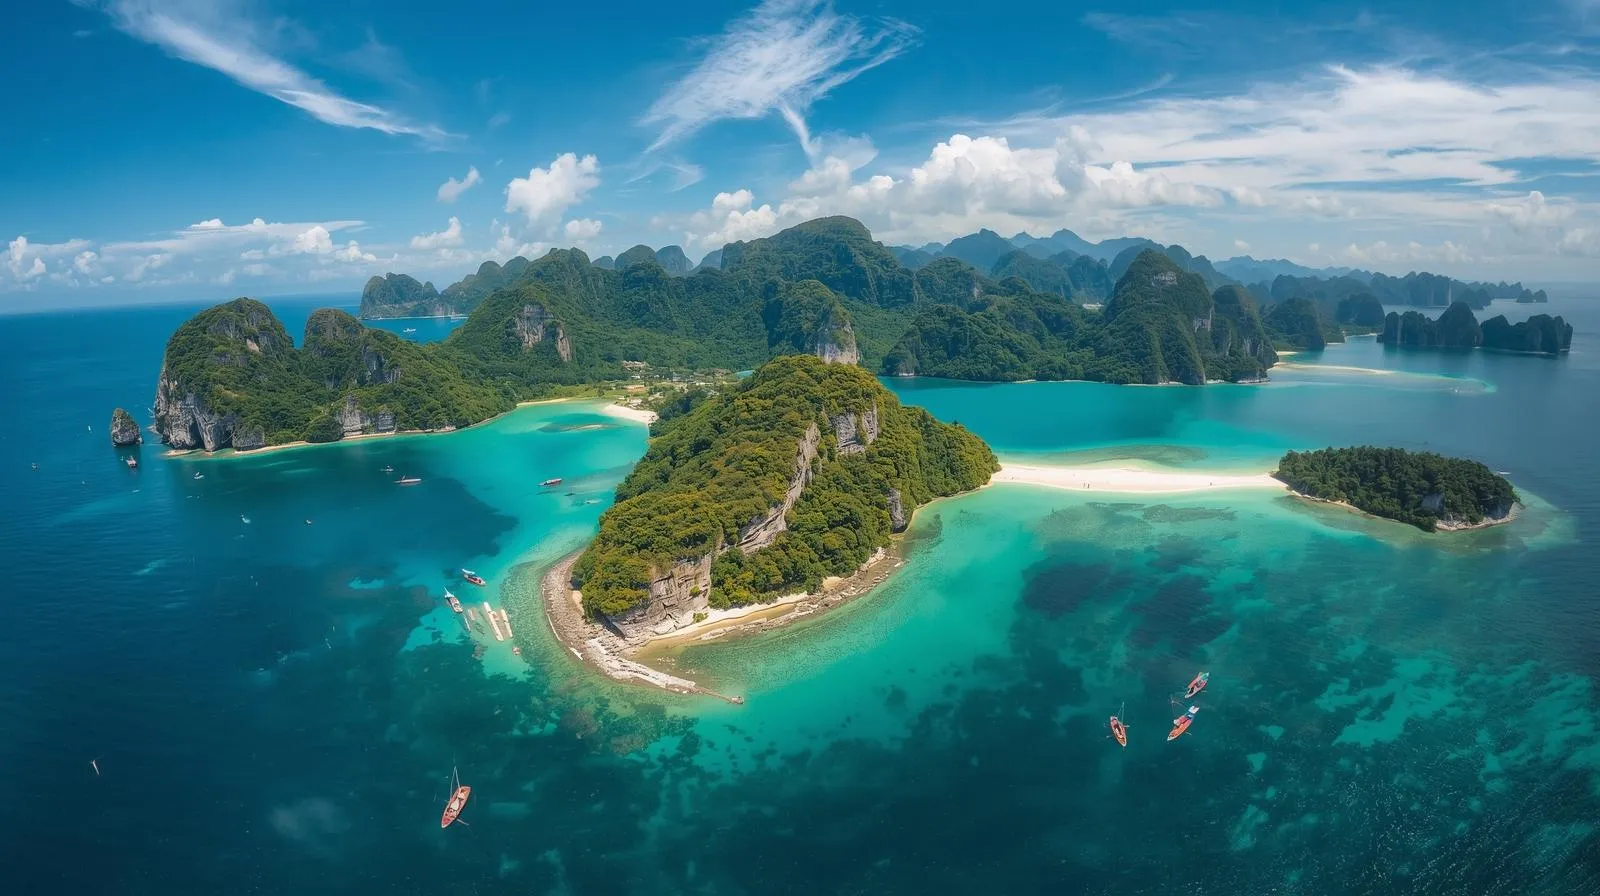
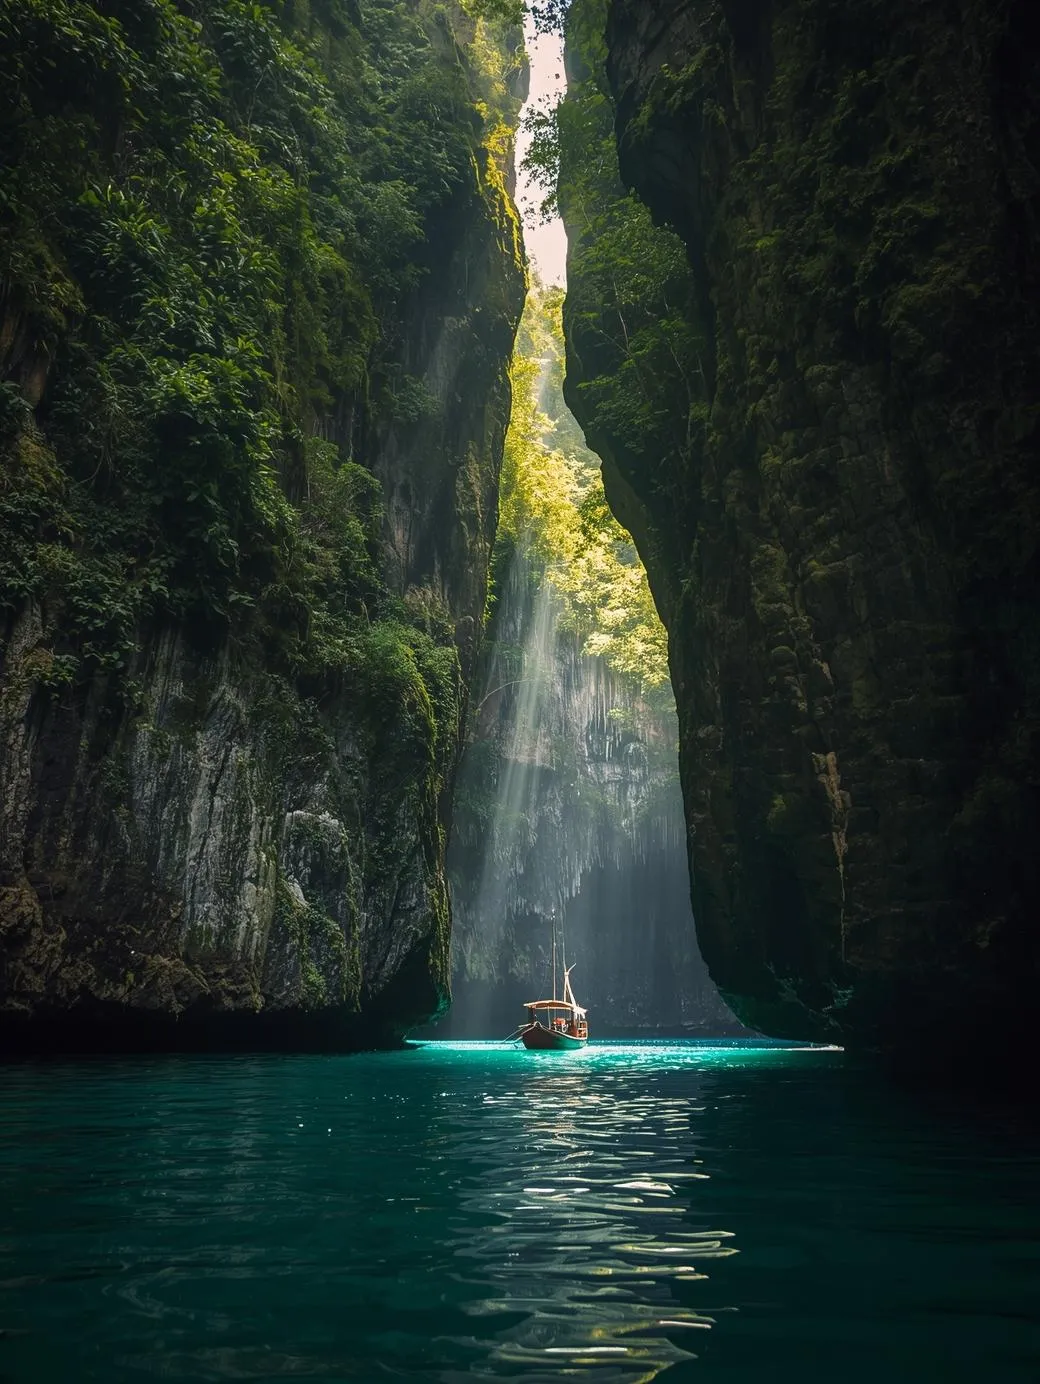
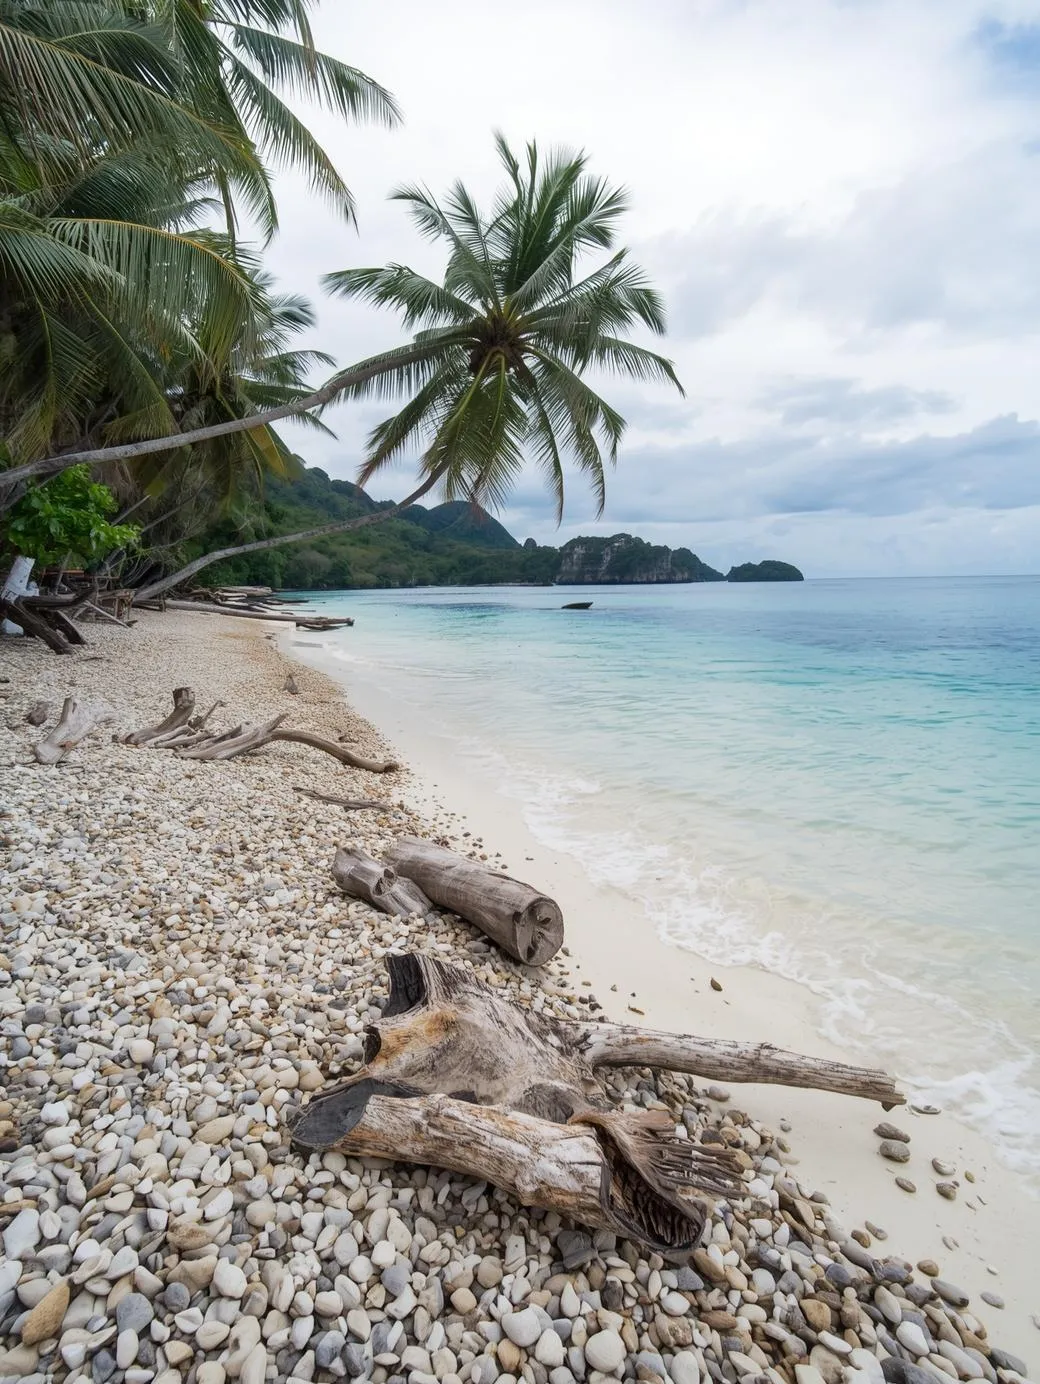
Days 3-5: Coron, Palawan; Pristine Lagoons and WWII History
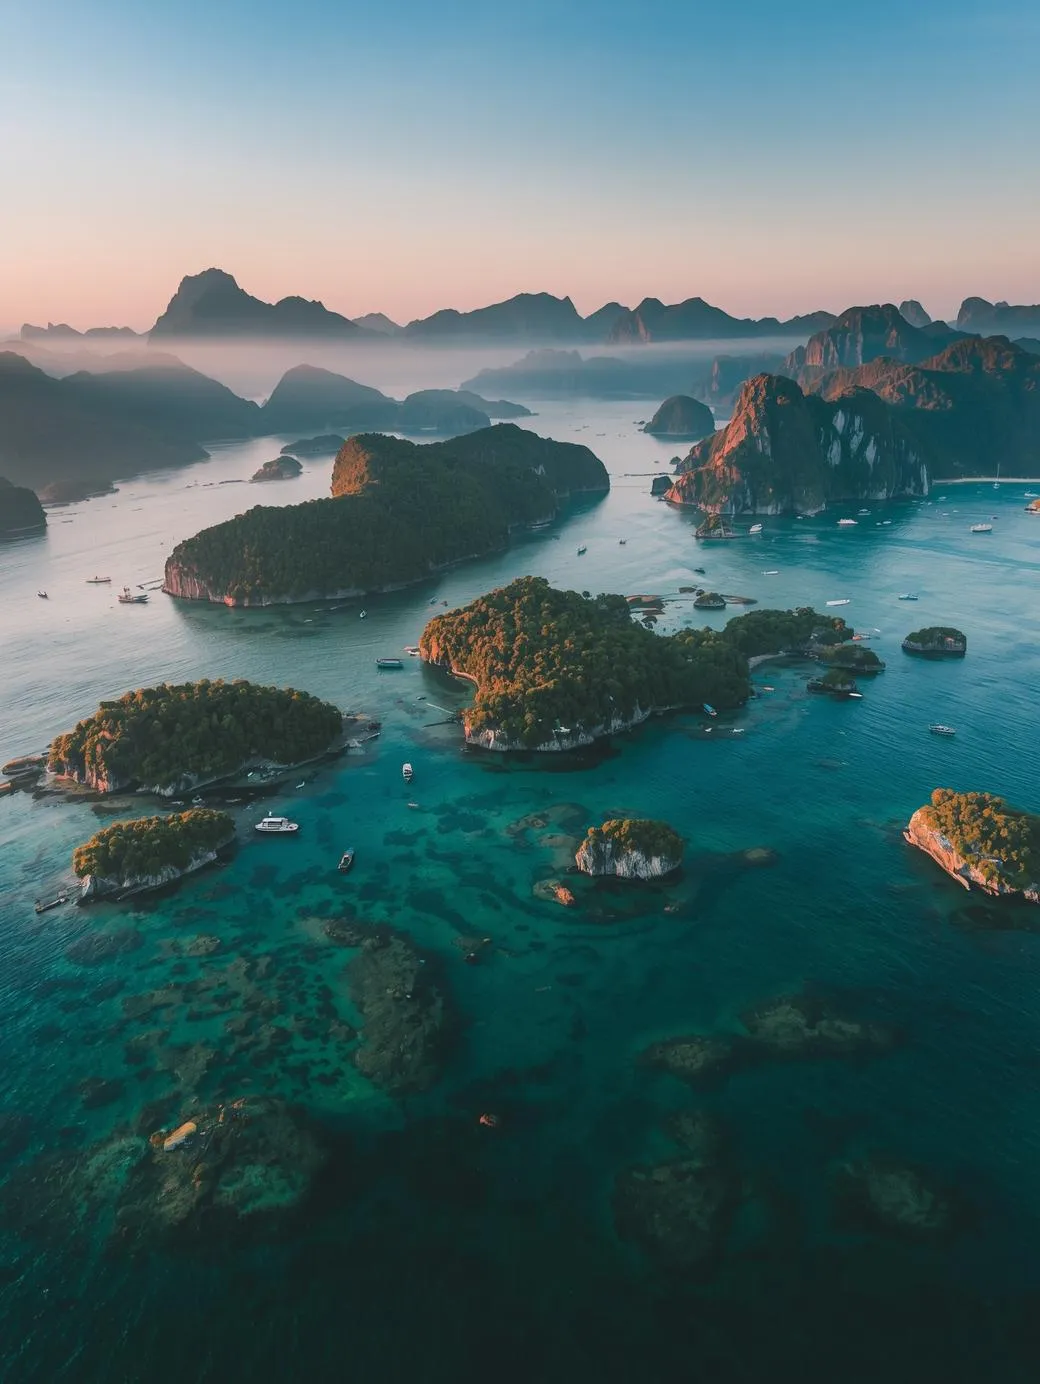
A 1.5-hour flight from Manila brings you to Busuanga Airport, the gateway to Coron. Coron offers a quieter, less developed vibe than its neighbor, El Nido, with world-class snorkeling and dramatic limestone landscapes.
The best tour programs in the region of Palawan are waiting for you. Check the details.
Where to Stay in Coron
Stay in Coron Town for easy access to tours, restaurants, and the port. Options range from budget guesthouses to comfortable mid-range hotels. Book ahead during peak season.
Day 3: Arrival and Sunset Views
Settle into your accommodation and explore the town. In the late afternoon, hike Mt. Tapyas. The 700+ steps are worth it for panoramic sunset views over Coron Bay and the surrounding islands.
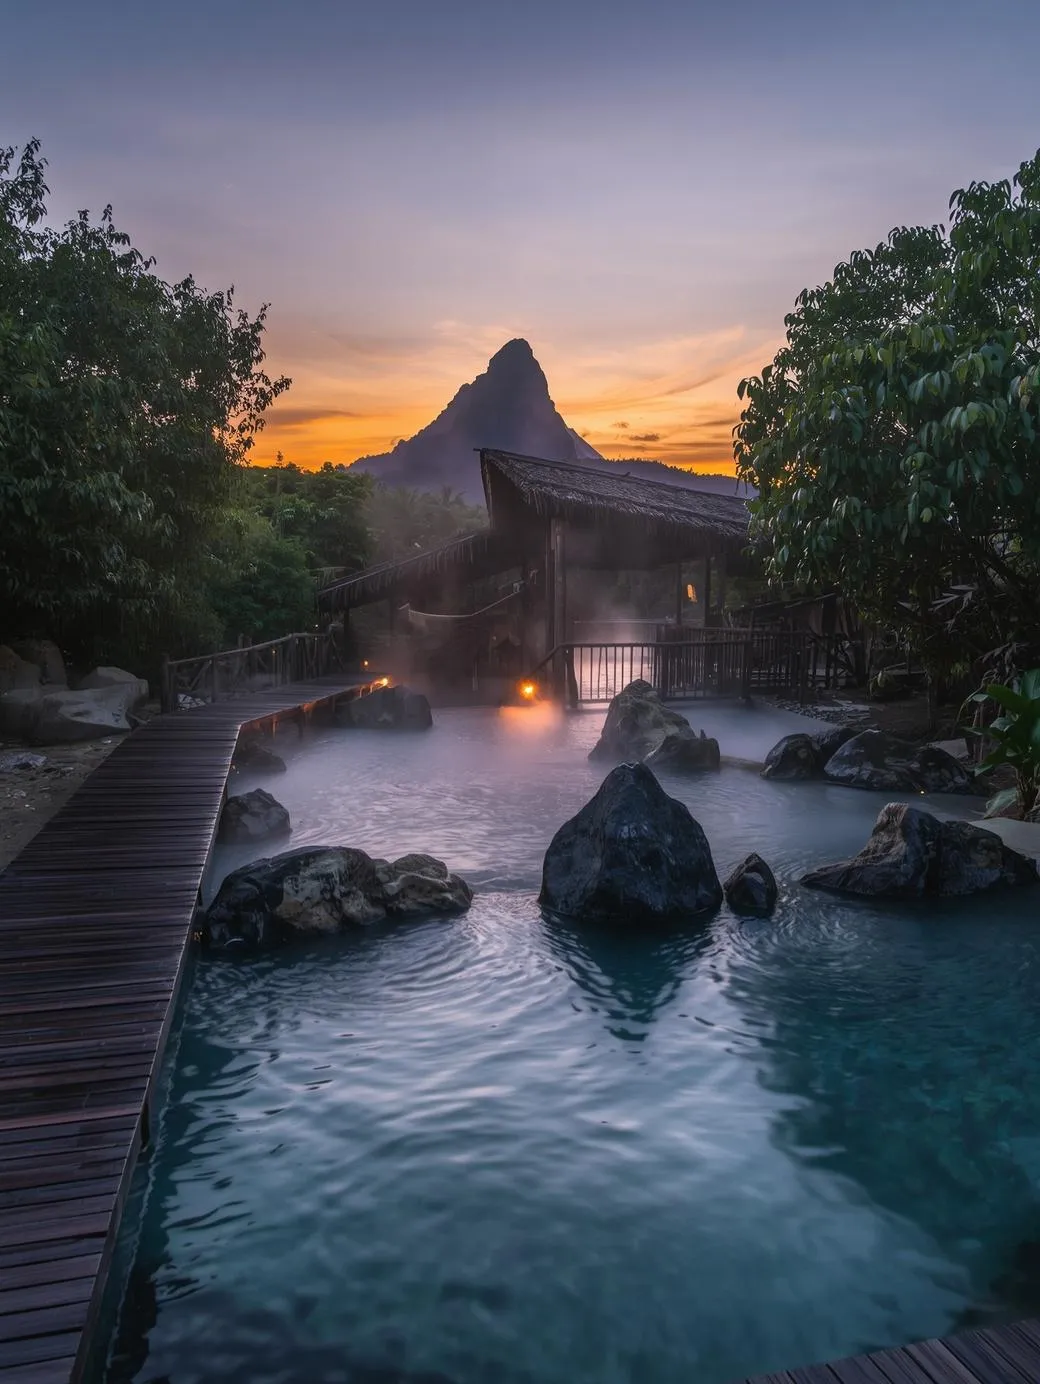
After dark, unwind at Maquinit Hot Springs, natural saltwater hot springs heated by volcanic activity. It’s the perfect way to soak away travel fatigue.
Day 4: Coron Island Hopping (The Ultimate Tour)
Today is what you came for. Book the Coron Super Ultimate Island Hopping Tour – it’s a full-day excursion (roughly 8 hours) that hits the highlights:
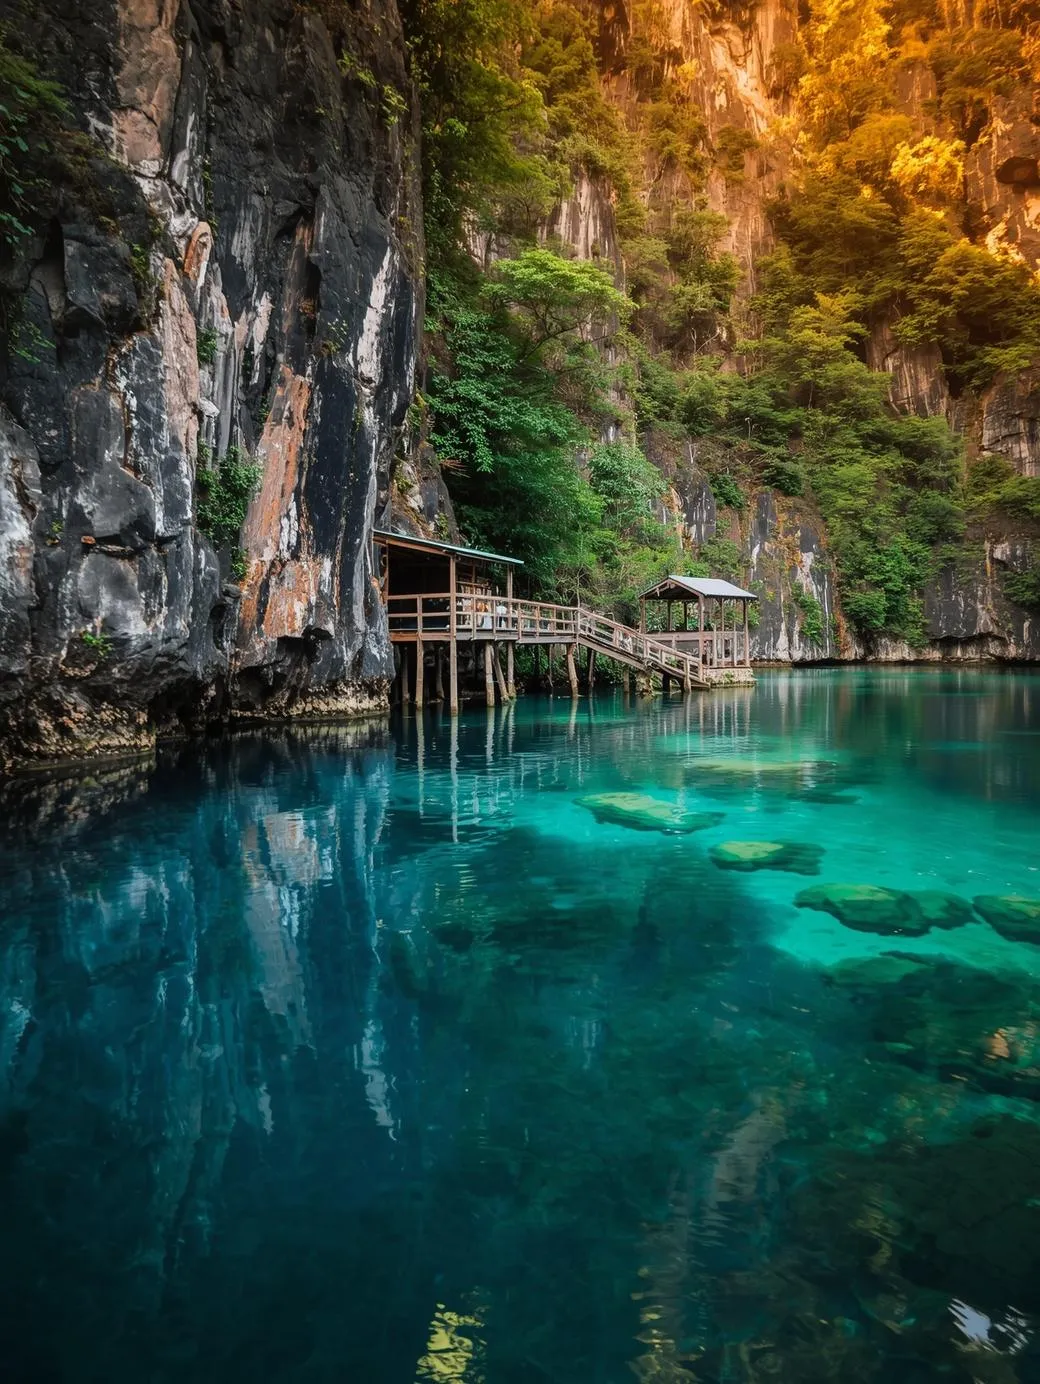
- Kayangan Lake: Often called the cleanest lake in Asia, with crystal-clear water surrounded by karst cliffs
- Barracuda Lake: A unique thermocline lake with dramatic rock formations
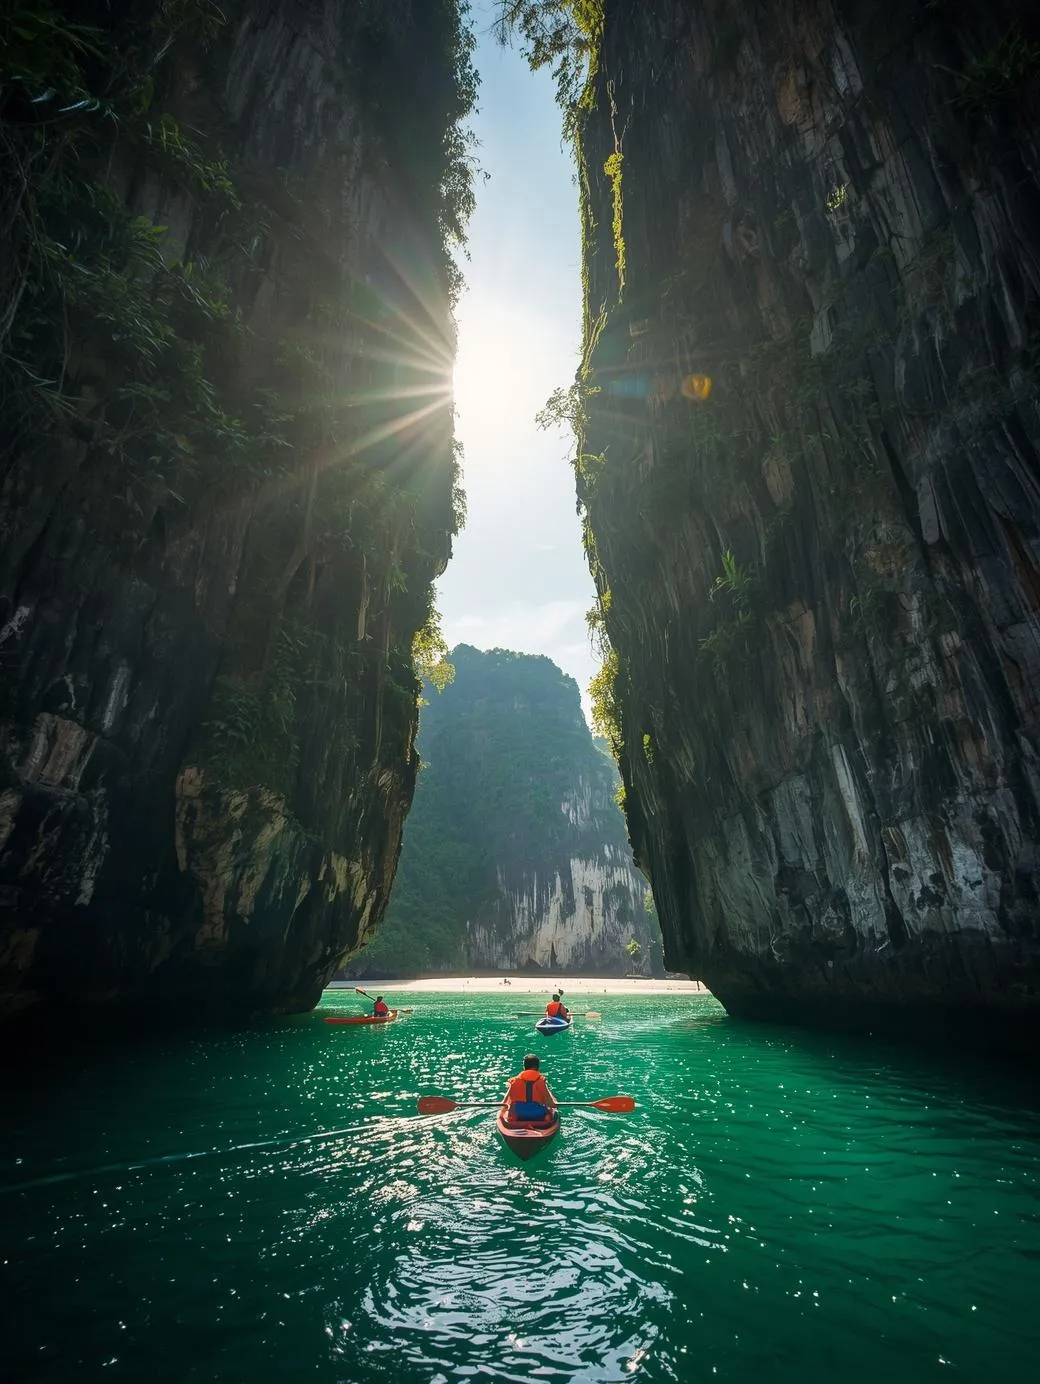
- Twin Lagoons: Kayak through a crevice into hidden lagoons
- Siete Pecados Marine Park: Excellent snorkeling with vibrant coral gardens
- Beach 91: A pristine stretch for lunch and relaxation
Check the available tours and plan early for ease. Tours typically include lunch on a beach, snorkeling gear, and guides. Cost: around $20-$30 per person.
Day 5: Choose Your Adventure
Option A – For Divers: Coron is famous for its WWII Japanese shipwrecks. Numerous dive shops offer trips for all certification levels. Even if you’re not certified, many offer introductory dives.
Option B – For Non-Divers: Rent a motorbike ($8-$10/day) and explore hidden beaches like Cabo Beach or Marcilla Beach. Alternatively, take a shorter island-hopping tour focusing on snorkeling spots you might have missed.
Practical Coron tips:
- Bring cash – many places don’t accept cards
- Don’t drink tap water, even for brushing teeth
- Reef-safe sunscreen is essential to protect marine life
While exploring the Calamian Islands, make sure your Coron excursion includes a trip to the Sandbar in Busuanga, Palawan, Philippines: Nature’s Hidden Paradise, which is perfect for that dreamy midday swim.
Days 6-8: El Nido, Palawan; The Crown Jewel
Take the 5-hour fast ferry from Coron to El Nido. Book tickets in advance through Ferries or Montenegro Lines. The journey itself is scenic, winding through the stunning Bacuit Bay.
Where to Stay in El Nido
Options range from budget hostels in town to luxury resorts. For a unique experience, consider glamping at Nacpan Beach (40 minutes from town). Mid-range travelers will find comfortable beachfront hotels in El Nido town or along the main beach.
Day 6: Arrival and Las Cabanas Sunset
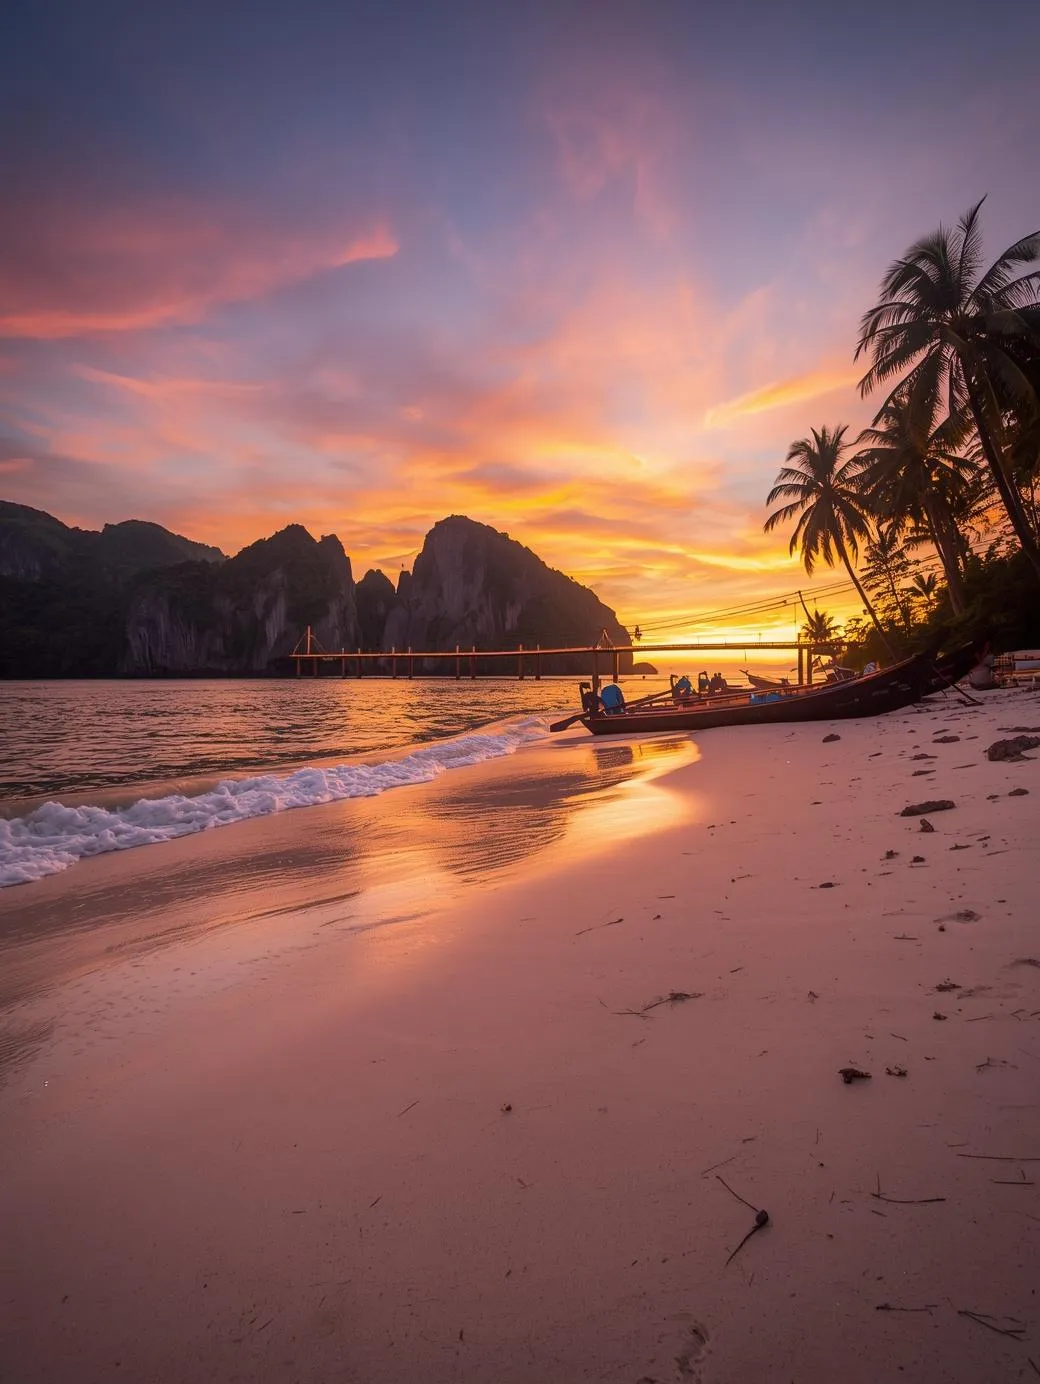
After checking in, head to Las Cabanas Beach, a 10-minute tricycle ride from town. It’s famous for its sunset views, beach bars, and a zipline that crosses over the water. Grab a fresh juice, find a spot on the sand, and watch the sky turn orange.
There are many tours available for El-Nido. You can find all the details of the programs here.
Day 7: Island Hopping Tour (The Classics)
This tour is the most popular for good reason. It includes:
- Big Lagoon: Kayak through emerald waters surrounded by towering limestone cliffs – book the kayak add-on, it’s worth it
- Secret Lagoon: A hidden pool accessible through a small rock crevice
- Shimizu Island: Excellent snorkeling spot
- 7 Commando Beach: White sand, clear water, and a relaxed vibe
Tours run from about 9 AM to 4 PM and include a buffet lunch. Cost: around $20-$25.
For a slower pace between the bustling hubs of El Nido and Coron, spend a few nights relaxing by the sea at the Island Homes in Port Barton, Palawan, Philippines: A Hidden Paradise for Dreamers and Digital Nomads.
Day 8: Island Hopping Tour (Snorkeling Focus)
This tour emphasizes snorkeling and hidden coves:
- Hidden Beach: A secluded cove accessible only by boat
- Matinloc Shrine: A stunning shrine on a small island with panoramic views
- Tapiutan Strait: Great snorkeling with healthy coral
Evening: Experience El Nido’s laid-back nightlife. Start with sunset juices and enjoy the night stars with your loved ones.
El Nido practical tips:
- Book tours a day in advance during peak season
- Tours often fill up – don’t wait until the last minute
- Bring cash for environmental fees ($1-$5 per island)
Do you know! A peaceful and less crowd place is the Rock Pools in Siargao Island, Philippines: Nature’s Hidden Infinity Pools offer a refreshing break from the ocean swells.
Days 9-11: Cebu – Waterfalls, Wildlife, and Adventure
Fly from El Nido (via Puerto Princesa or direct if available) to Cebu City (~1.5 hours). Cebu offers a different flavor – urban energy combined with incredible nature.
Where to Stay in Cebu
- First night: Stay in Cebu City (IT Park or Ayala area) for convenience
- Next two nights: Head south to Moalboal or Badian for beach access
Cebu also offers a variety of activities. From budget options to all-time luxury tours are available. Check out the variety of activities in Cebu here.
Day 9: Travel to Moalboal
Fly to Cebu and transfer south (3-4 hours by van or bus) to Moalboal. This is a travel day, so settle into your beachfront accommodation. If you arrive early, visit White Beach for a relaxing afternoon.
Day 10: Kawasan Falls Canyoneering
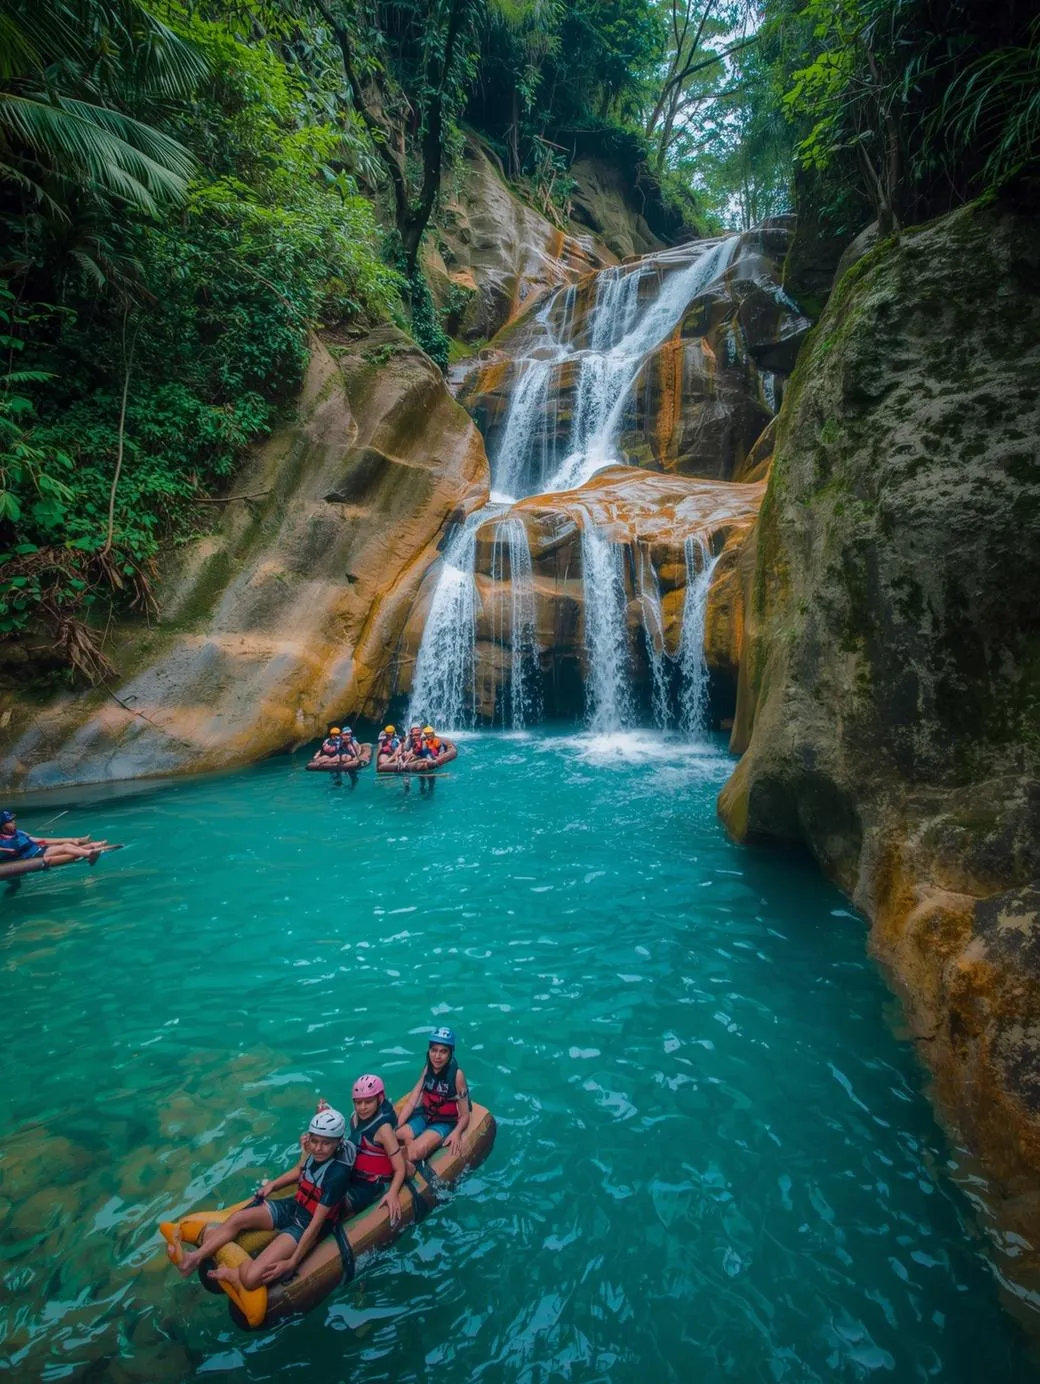
This is one of the Philippines’ most thrilling adventures. You’ll trek, swim, climb, and cliff jump through a stunning canyon system, ending at the magnificent Kawasan Falls.
What to know:
- Start early (around 7 AM) to beat crowds
- Book through a reputable operator that provides safety gear and guides
- Wear water shoes with a good grip (rentals available)
- Bring a waterproof phone case or camera
- Cost: around $30-$40, including lunch
Alternative: If canyoneering isn’t your style, visit the falls directly for swimming and photos.
Day 11: Snorkeling and Sardine Run
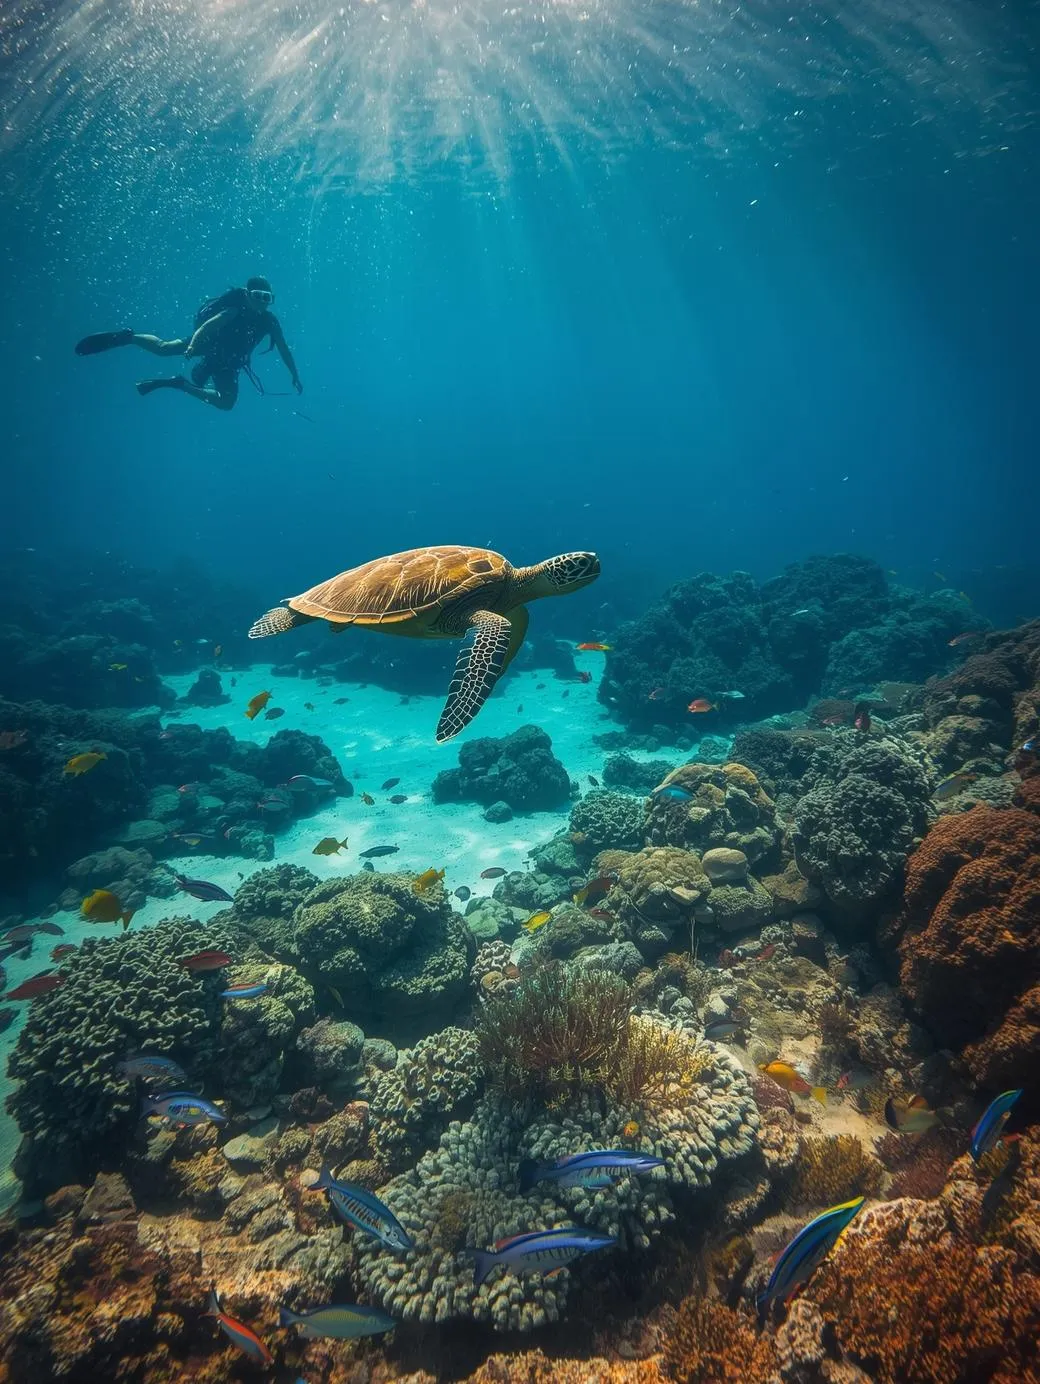
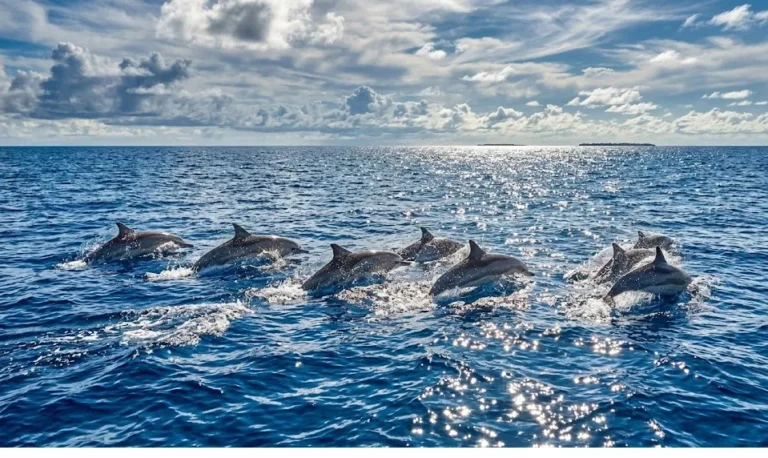
Go snorkeling at the Sardine Run in Moalboal. Millions of sardines gather in a massive baitball just meters from the shore – an unforgettable sight. You can swim right over them from the beach.
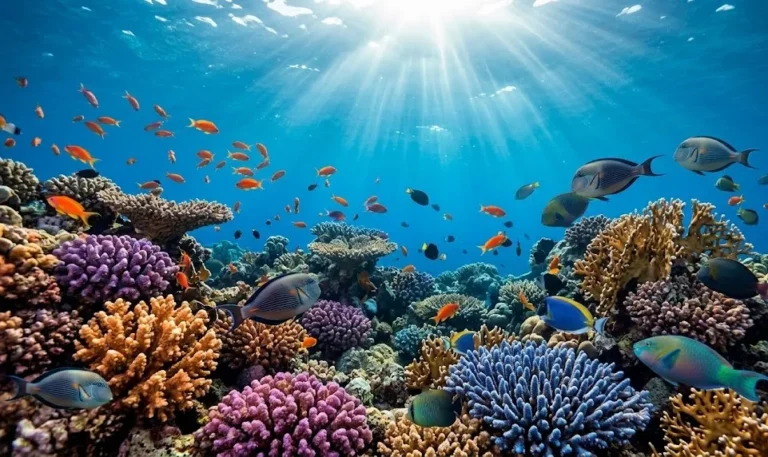
Also consider: Snorkeling at Pescador Island, known for turtles and beautiful coral gardens.
Ethical note on Oslob whale sharks: Many travelers visit Oslob to see whale sharks, but the practice of feeding them to guarantee sightings is controversial and disrupts natural migration patterns. The sardine run offers a more ethical marine encounter.
Days 12-13: Boracay – World-Famous White Beach
Fly from Cebu to Caticlan (MPH), the gateway to Boracay (~1 hour). From Caticlan, take a tricycle to the jetty port (5 minutes), then a 15-30 minute ferry to Boracay Island.
The perfect plans and many tours of Boracay are available here.
Where to Stay in Boracay
Choose based on your vibe:
- Station 1: Luxury resorts, more space, upscale vibe
- Station 2: Nightlife, dining, shopping, busy, and vibrant
- Station 3: Quieter, budget-friendly, relaxed atmosphere
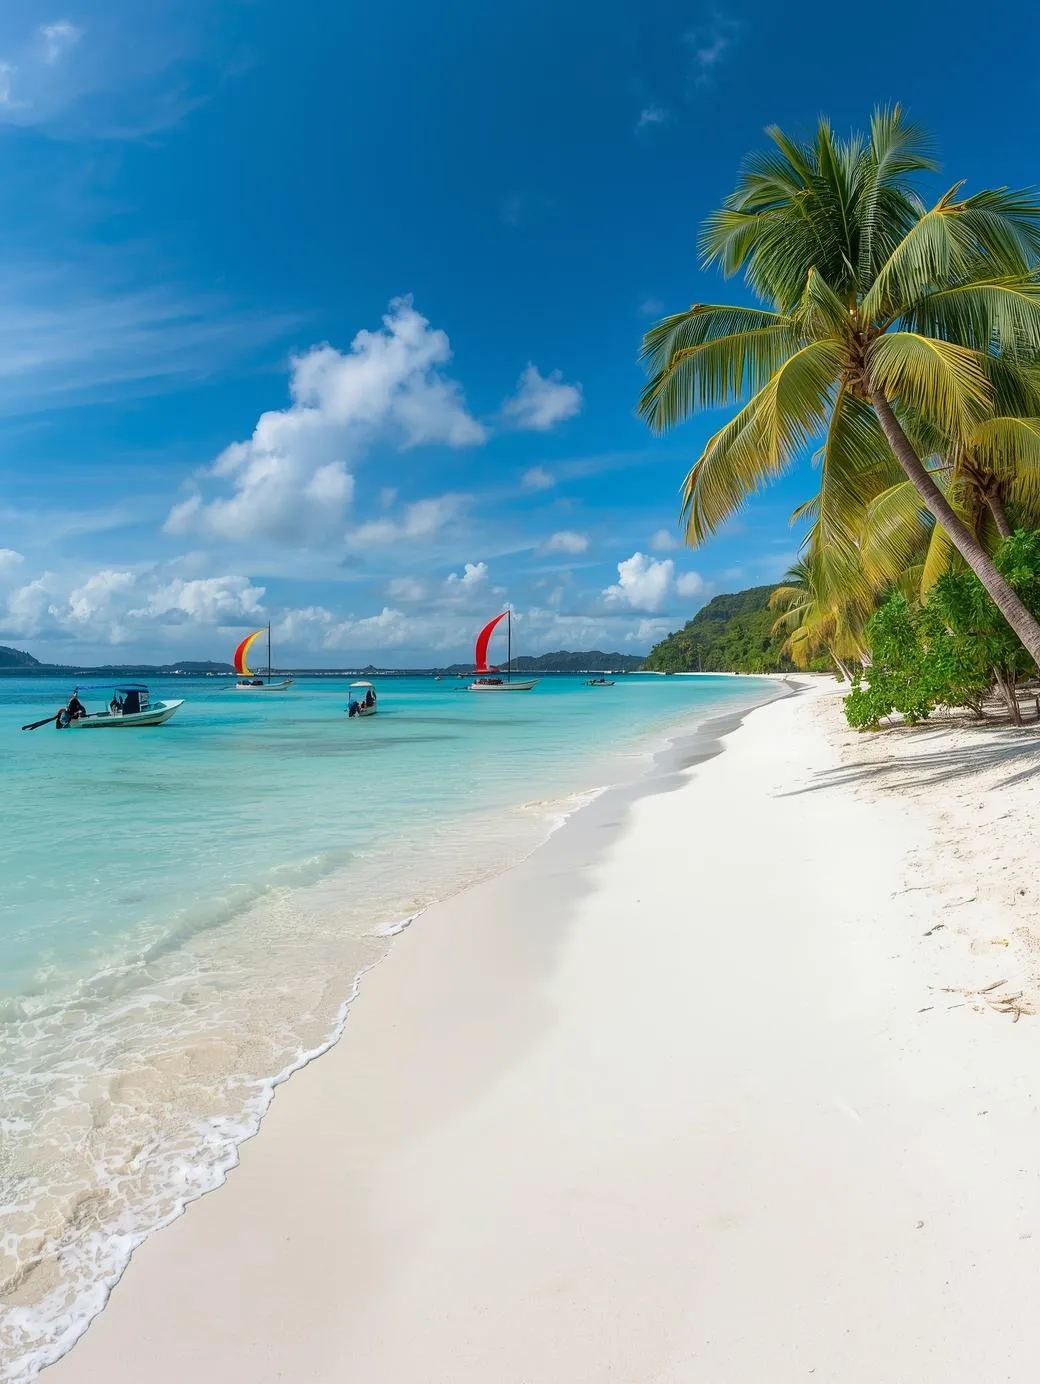
Day 12: White Beach and Sunset
Transfer to Boracay and check in. Spend the afternoon walking the famous White Beach path – it’s 4 kilometers of powdery sand and clear water. Explore the shops at D’Mall and find the perfect spot for sunset.
Don’t miss: Get a massage on the beach – it’s a quintessential Boracay experience, with prices around $10-$15 for an hour.
Day 13: Island Hopping and Last Night
Take a boat trip to:
- Puka Beach: Named for the puka shells found here, quieter than White Beach
- Crystal Cove Island: Snorkeling and tidal pools
- Crocodile Island: Actually shaped like a crocodile, great snorkeling
Visit Willy’s Rock, a volcanic rock formation with a shrine, located off Station 1. It’s the most photographed spot on the island.
Final night: Enjoy a fantastic Filipino dinner. Boracay has an incredible range – from casual beachfront BBQ to high-end restaurants.
Day 14: Manila → Home
Travel back from Boracay to Caticlan (reverse the ferry process), fly to Manila (~1.5 hours), and connect to your international flight home.
Crucial tip: Manila traffic is unpredictable. Allow at least 4-5 hours between your domestic arrival in Manila and your international departure. This accounts for delays, terminal transfers, and the notorious traffic.
If you have extra time and want to venture off the beaten path during your two-week adventure, consider swapping a busy tourist spot for the marble shores of Romblon, Philippines: The Underrated Island Paradise You Need to Visit.
Practical Tips for US Travelers
Getting Around: Transportation Reality Check
The Philippines has over 7,000 islands – getting around takes time, and that’s part of the charm if you plan well.
| Route | Mode | Duration | Cost Range |
| Manila → Coron | Flight | 1.5 hours | $40-$80 |
| Coron → El Nido | Fast Ferry | 4-5 hours | $20-$30 |
| El Nido → Cebu City | Flight (via Puerto Princesa) | ~2.5 hours total | $50-$100 |
| Cebu City → Moalboal | Van/Bus | 3-4 hours | $5-$10 |
| Cebu → Caticlan | Flight | 1 hour | $40-$80 |
| Caticlan → Boracay | Tricycle + Ferry | 45-60 minutes | $5-$10 |
Book domestic flights early – Cebu Pacific, Philippine Airlines, and AirAsia serve most routes, and prices rise as dates approach.
Local Transportation Options
- Tricycles: Motorbikes with sidecars, the main transport in towns. Negotiate fare before riding. Short rides: $0.50-$2
- Jeepneys: Colorful converted military jeeps, the backbone of local transport. Fares: $0.20-$0.50
- Grab: Ride-hailing app, works in major cities, safer than street taxis
- Motorbike rental: $5-$10/day in tourist areas. Wear a helmet – roads can be rough
Safety and Health
The Philippines is generally welcoming and safe for tourists, but common sense applies :
- Keep valuables secure in crowded areas
- Carry copies of essential documents
- Travel health insurance is highly recommended
- Pack a basic first aid kit for remote island visits
- Use only bottled water for drinking and brushing teeth
Weather awareness: Typhoon season runs from June to November. Monitor forecasts and build flexibility into your itinerary during these months.
Packing Essentials
- Light, breathable clothing – tropical climate year-round
- Reef-safe sunscreen – standard sunscreen damages coral
- Sturdy waterproof bag – for boat days and island hopping
- Universal travel adapter – Philippines uses 220V, Type A/B/C outlets
- Power bank – charging opportunities can be limited on boats
- Local SIM card – Globe and Smart offer inexpensive data, strong coverage in tourist areas
Food: What to Eat
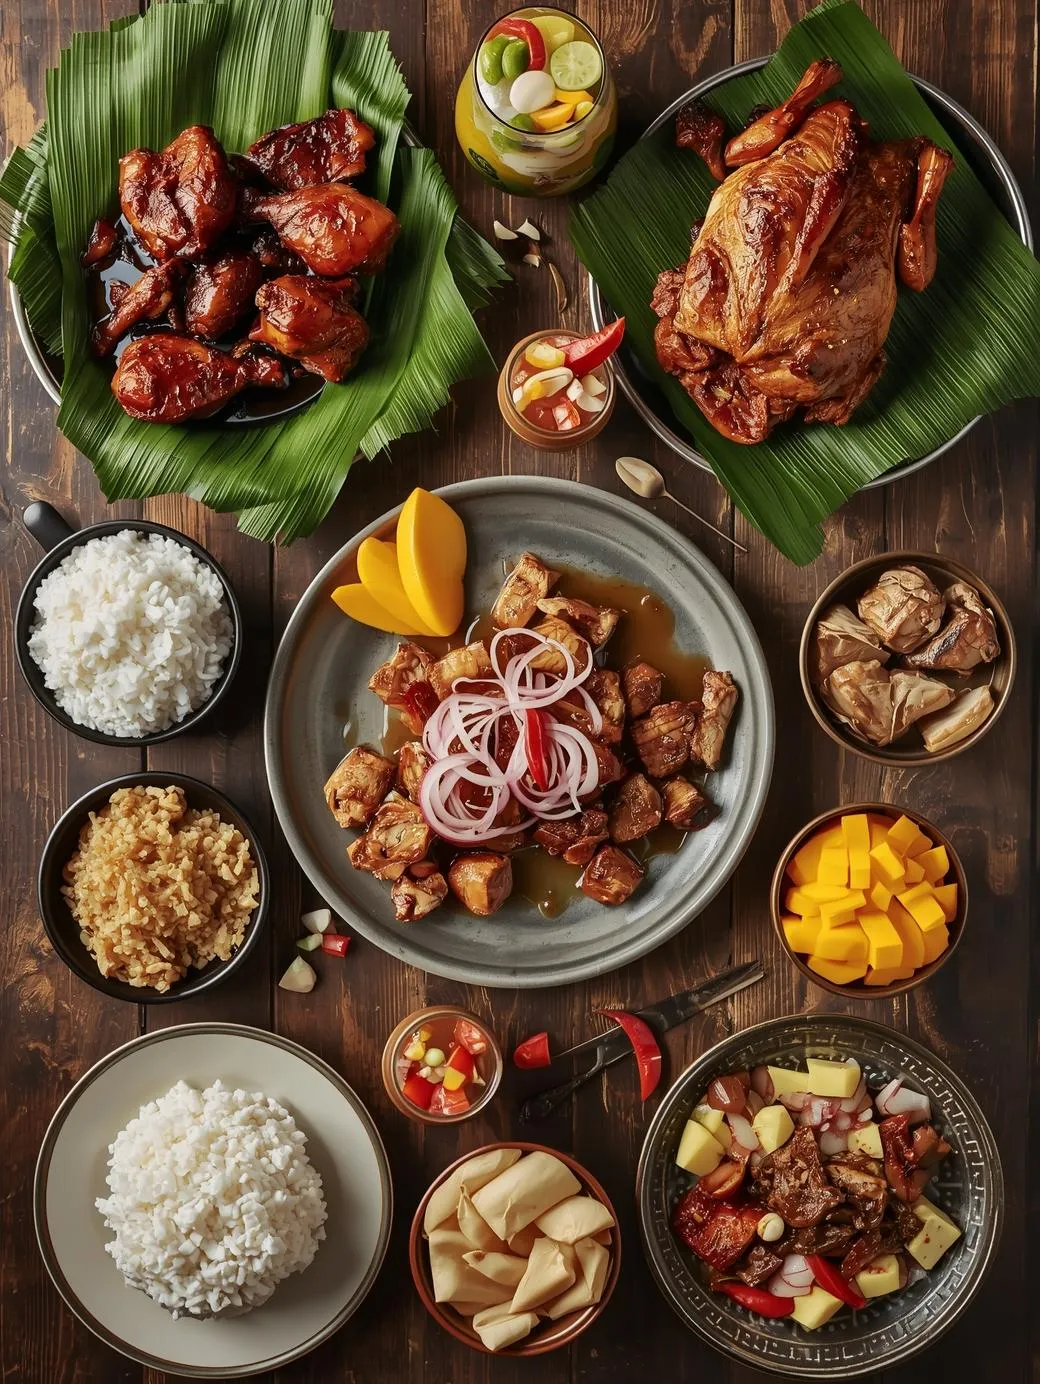
Filipino cuisine blends Malay, Spanish, Chinese, and indigenous influences. Must-try dishes:
- Adobo: Chicken braised in vinegar, soy sauce, garlic – the national dish
- Halo-halo: Shaved ice dessert with fruits, beans, ice cream – perfect for hot days
- Fresh mangoes and bananas – some of the sweetest you’ll ever taste
Note: The Pig and Haram food is used in many of the Philippines. Therefore, if you are a Muslim, make sure to double check what you are eating.
Street food tip: Choose busy stalls with high turnover for the freshest options.
Local Culture and Etiquette
Filipinos are famously hospitable. A few tips for positive interactions:
- Smile – it goes a long way
- Learn basic phrases: Salamat (thank you), Magandang araw (good day)
- Dress modestly at religious sites and in small towns
- Tipping isn’t mandatory, but appreciated – $1-$2 for good service is generous
Sample Budget Breakdown for 2 Weeks
Here’s what a realistic trip costs for one person, mid-range style:
| Expense | Cost |
| International flight (US-Manila round trip) | $500-$1,200 |
| Domestic flights (3-4 flights) | $150-$250 |
| Accommodation (13 nights at $50/night) | $650 |
| Food ($15/day) | $210 |
| Tours and activities | $200-$300 |
| Transportation (ferries, taxis, etc.) | $100-$150 |
| Miscellaneous (SIM card, tips, etc.) | $50-$100 |
| Total | $1,860 – $2,860 |
For two people traveling together, costs per person drop significantly since accommodations and some tours can be shared.
Frequently Asked Questions
Is the Philippines safe for US tourists?
Yes, the Philippines is generally safe for tourists. Exercise normal precautions – secure valuables, avoid poorly lit areas at night, and use reputable transport. The people are known for their hospitality toward Americans.
Do I need any vaccinations?
Check with your doctor, but typical recommendations include hepatitis A, typhoid, and routine vaccinations. Travel health insurance is strongly recommended.
Can I use credit cards everywhere?
In major cities and tourist areas, yes. But bring cash for smaller islands, markets, and tricycles. ATMs charge fees, so withdraw larger amounts less often.
Will I have cell service and WiFi?
Major tourist destinations have good coverage. Buy a local SIM for data – Globe and Smart offer affordable packages. Remote islands may have spotty service.
Is English widely spoken?
Yes, English is an official language and widely spoken, especially in tourism, business, and government. You’ll have no trouble communicating.
Final Thoughts: Why This Trip Works for US Travelers
This itinerary works because it respects your time. Two weeks is enough to experience the Philippines’ diversity without feeling rushed. You’ll hit the absolute highlights – Manila’s history, Palawan’s lagoons, Cebu’s adventure, and Boracay’s famous beach – with realistic travel days in between.
The Philippines rewards travelers who embrace its pace. Things move a little slower here, and that’s the point. Leave room for spontaneous detours, strike up conversations with locals, and let the islands work their magic.
Your biggest challenge won’t be logistics – it’ll be leaving.