Ultimate Mount Rainier National Park Itinerary and Guide
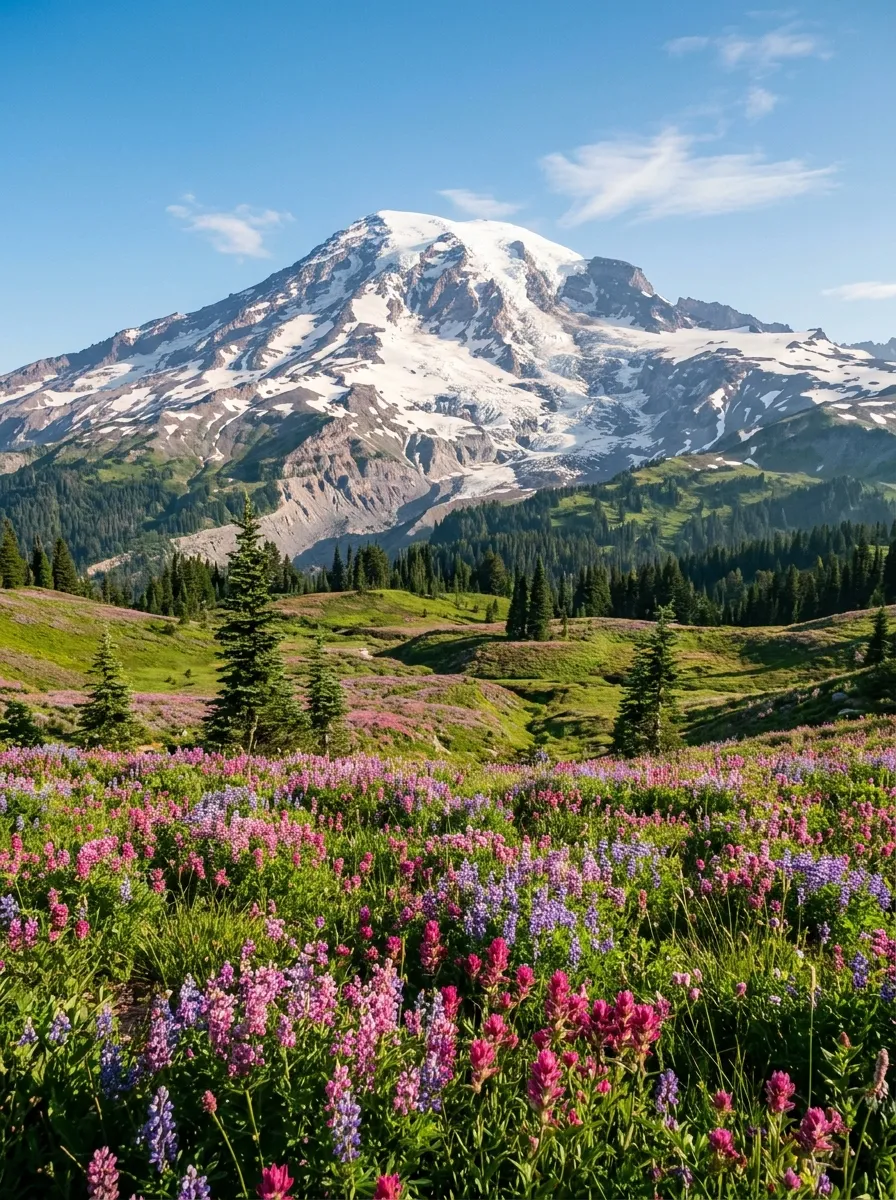
Mount Rainier National Park is one of the most spectacular places to visit in Washington State. Its towering snow-covered volcano, wildflower-filled meadows, ancient forests, cascading waterfalls, and mountain lakes make it a dream destination for hikers, photographers, and anyone who loves the outdoors.
The park centers on Mount Rainier, an active volcano that rises 14,410 feet above sea level. On a clear day, the mountain dominates the skyline, but the park offers much more than dramatic views of its famous peak. Each region has a distinct personality, from the alpine scenery around Paradise to the forests and historic landmarks near Longmire.
Planning a visit takes a little thought because Mount Rainier National Park is enormous, roads are seasonal, and driving between different areas can take longer than expected. The best itinerary depends on how much time you have, which trails you want to explore, and the conditions during your visit.
This guide covers the best places to see, a practical one-day itinerary, a more relaxed three-day plan, hiking options, seasonal advice, accommodation, and essential tips to help you make the most of your trip.
Recommended Travel Items for Your Trip
Where Is Mount Rainier National Park?
Mount Rainier National Park is in western Washington, southeast of Seattle. The park protects approximately 236,000 acres of mountain landscapes, forests, rivers, glaciers, and subalpine meadows.
Seattle is a popular starting point for visitors, while Tacoma and Olympia are also useful bases for reaching the park. The nearest gateway communities include Ashford on the southwest side and Packwood to the southeast.
Approximate driving times vary with traffic, weather, road conditions, and your chosen entrance. From Seattle, reaching the Paradise area can take around two to three hours or longer. The journey from Tacoma is generally shorter, while visitors coming from Portland should allow several hours.
Mount Rainier has several distinct regions, and the entrance you choose matters. Paradise and Longmire are on the southwest side, Sunrise is in the northeast, and Ohanapecosh is in the southeast. Carbon River and Mowich Lake are in the northwest, although access to these areas can be affected by road closures.
Do not assume that you can easily drive from one region to another during a day trip. Mountain roads, seasonal closures, and the distance between trailheads can make a seemingly short itinerary surprisingly demanding.
Best Time to Visit Mount Rainier National Park
The best time to visit depends on what you want to experience. Summer is the most popular season, but spring, autumn, and winter each offer something different.
Summer: July Through August
Summer is usually the most convenient season for exploring the park. Many roads, visitor facilities, and hiking trails are accessible, and the subalpine meadows around Paradise can burst into color with wildflowers.
July and August are especially popular with families, photographers, and hikers. Arrive early to improve your chances of finding parking at major destinations.
Keep in mind that summer does not guarantee warm weather or clear skies. Clouds can hide the mountain, afternoon weather can change quickly, and snow may remain on higher trails well into the season.
Early Autumn: September Through Early October
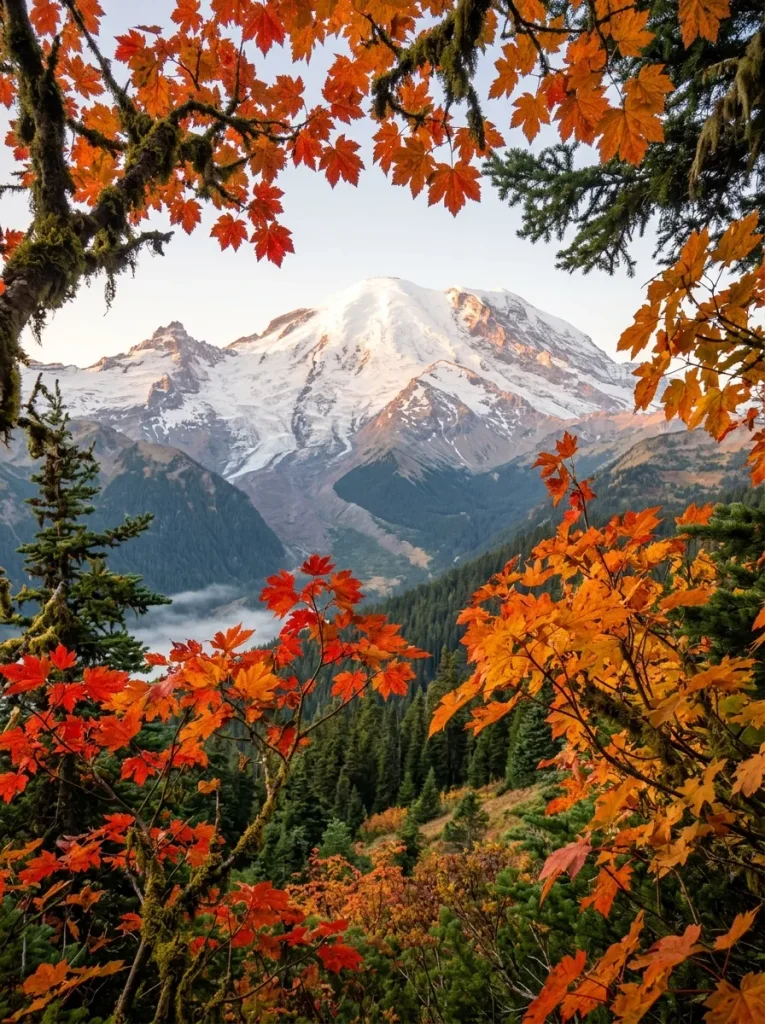
Autumn can be a wonderful time to visit if you prefer cooler temperatures and fewer summer crowds. The surrounding forests develop seasonal colors, and clear mornings can provide beautiful mountain views.
However, the park transitions quickly toward winter conditions. Some visitor facilities close, and higher roads or trails may become inaccessible because of snow, ice, or maintenance.
Check the status of your intended destination before setting out, particularly if your plans depend on reaching Sunrise or a high-elevation trail.
Spring: April Through June
Spring brings waterfalls, rushing streams, and the gradual return of green vegetation. Lower-elevation areas may be accessible while higher parts of the park remain buried under snow.
This season is best for visitors who are flexible about their plans. A trail that looks easy on a summer map may still require snow travel in May or June.
Winter: November Through March
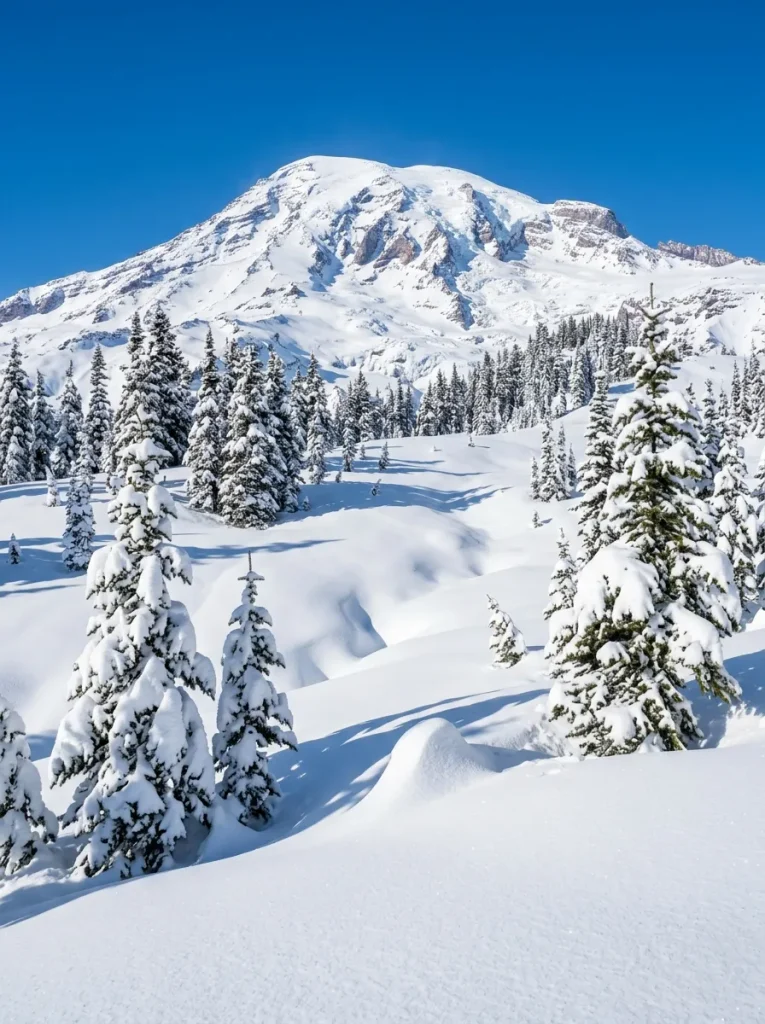
Winter transforms Mount Rainier into a snowy landscape suited to snowshoeing, winter photography, and snow-focused recreation. Paradise is one of the main destinations for winter visitors when road and weather conditions permit access.
Winter travel requires extra preparation. Roads can close temporarily, tire-chain requirements may apply, daylight is limited, and trails can become hazardous in poor weather.
Best overall recommendation: Choose July or August for the broadest selection of summer hiking opportunities. September is worth considering for a quieter visit, while winter is best for travelers who specifically want snow and are comfortable adapting to changing conditions.
Best Places to Visit in Mount Rainier National Park
The park has more attractions than most visitors can fit into one trip. Focus on one region for a day visit, or spread your exploration across several days.
1. Paradise
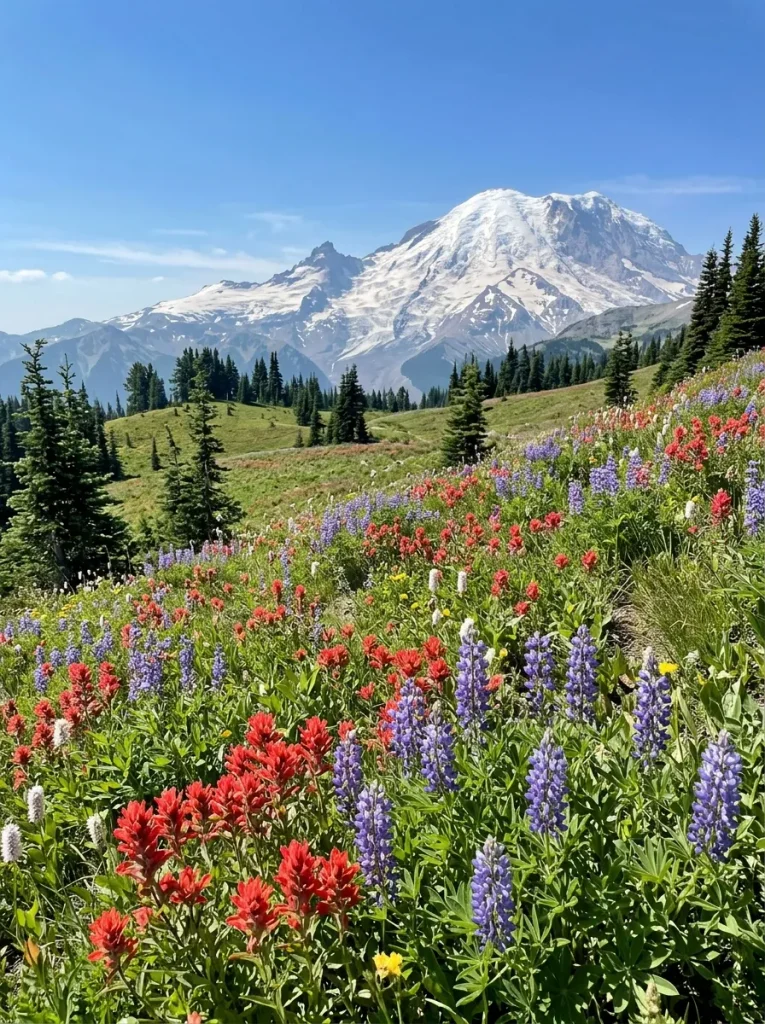
Paradise is one of the park’s most famous destinations, and for good reason. Located on the southern slopes of Mount Rainier, it offers mountain views, hiking trails, wildflower meadows, and access to the Henry M. Jackson Memorial Visitor Center.
The scenery changes with the seasons. In summer, green meadows and colorful flowers surround the trails. In winter, deep snow creates a dramatic alpine setting.
Start at the visitor center when it is open to check conditions, use the facilities, and learn about the park. Then choose a walk that matches your fitness level and the day’s weather.
Popular routes include the paved and unpaved paths around the Paradise meadows and longer hikes toward panoramic viewpoints. The Skyline Trail is a major attraction for experienced hikers, but snow and ice can make it unsuitable for casual visitors outside the summer hiking season.
Paradise is a strong choice for first-time visitors because you can enjoy impressive scenery without committing to a long backcountry hike.
2. Myrtle Falls
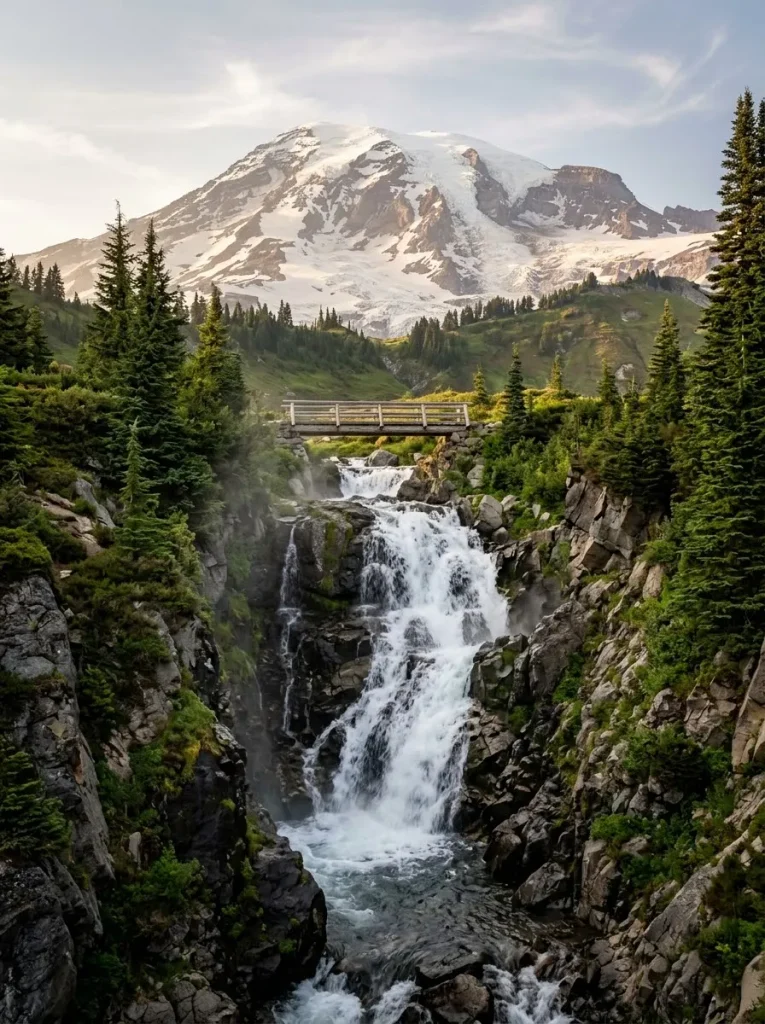
Myrtle Falls is a popular waterfall near Paradise, reached by a relatively short walk from the main Paradise trail area when the route is accessible.
The waterfall drops through a rocky landscape with Mount Rainier rising in the background when the sky is clear. It is one of the park’s memorable photo opportunities.
The path can be snowy, muddy, or slippery depending on the season. Do not assume the trail is safe simply because it is short. Wear footwear with good traction and follow posted trail conditions.
For visitors with limited time, Myrtle Falls can fit neatly into a Paradise-focused itinerary.
3. Reflection Lakes
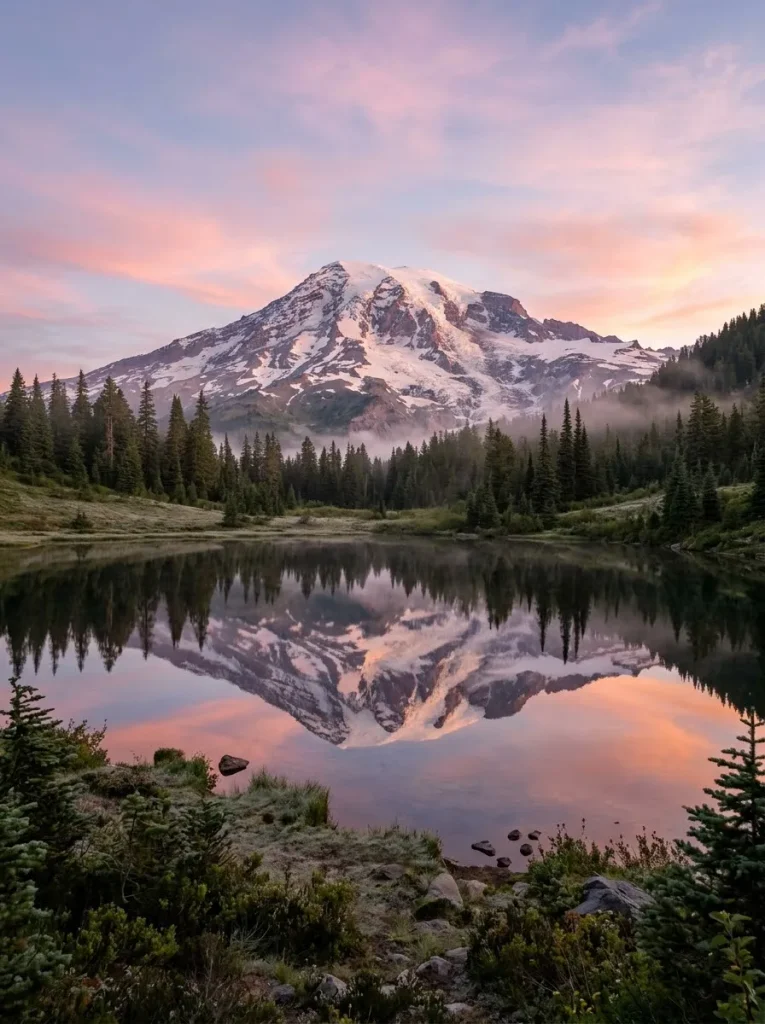
Reflection Lakes is known for the possibility of seeing Mount Rainier mirrored in calm water. When conditions cooperate, the mountain’s reflection creates a striking foreground for photographs.
The best reflections often occur when the wind is light and the sky is clear. Early mornings can provide favorable conditions, although the weather is never guaranteed.
You do not need to spend hours here. A short stop can be rewarding, particularly when the mountain is visible. Parking and roadside access depend on seasonal conditions, so check the current status before planning a visit.
4. Narada Falls
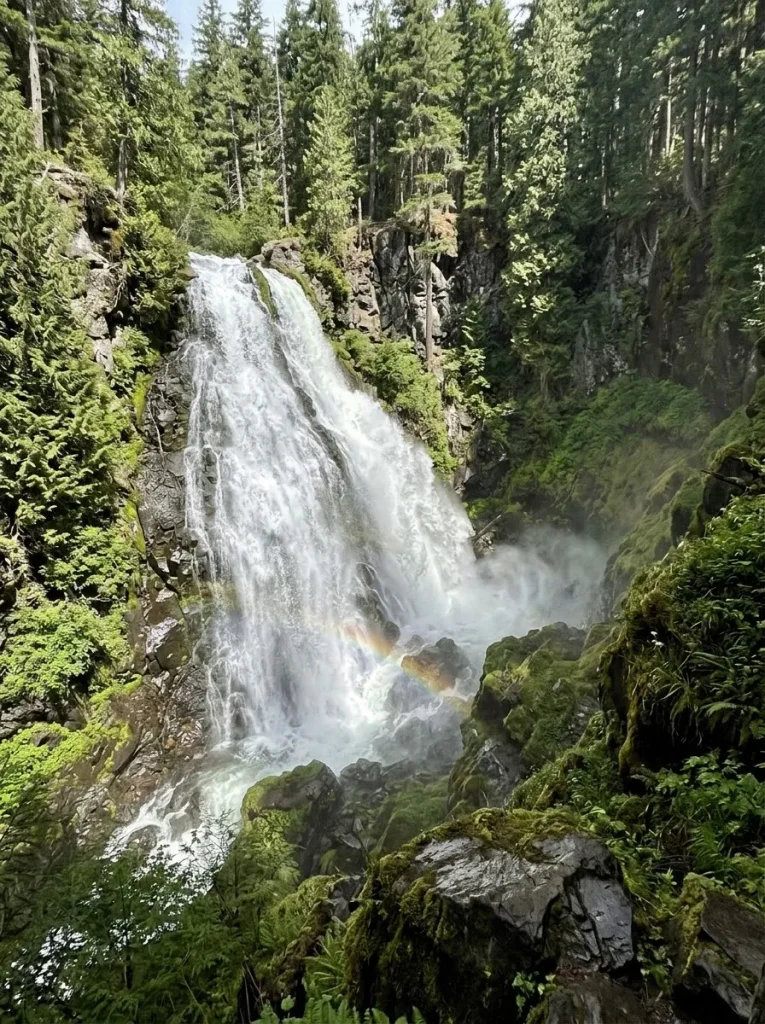
Narada Falls is one of the park’s most accessible major waterfalls when the relevant road and viewing areas are open.
Water plunges over a steep rocky ledge into a forested ravine. The main viewpoint offers a dramatic look at the falls, while the lower trail provides a closer perspective when conditions allow.
The lower route can be steep and slippery. Use caution around wet rocks, especially after rain or when temperatures are near freezing.
Narada Falls works well as a stop on the drive between Longmire and Paradise.
5. Longmire Historic District
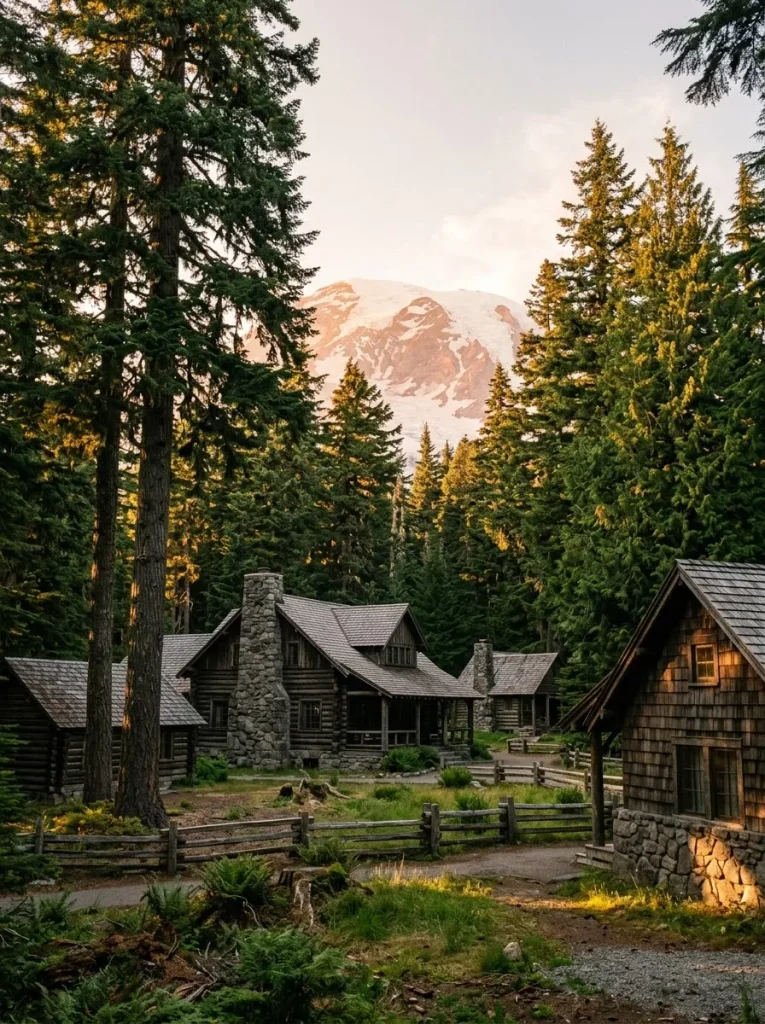
Longmire offers a combination of natural scenery and park history. Located near the southwest entrance, it is a useful stopping point before or after visiting Paradise.
The historic district includes buildings associated with the park’s early development, forested surroundings, and access to walking trails. The Longmire Museum provides information about the park’s natural and cultural history when open.
Longmire is also a practical place to pause, use available facilities, and learn more about current conditions. The main road to this area generally remains open year-round, although winter access and nearby roads are subject to safety closures.
6. Christine Falls
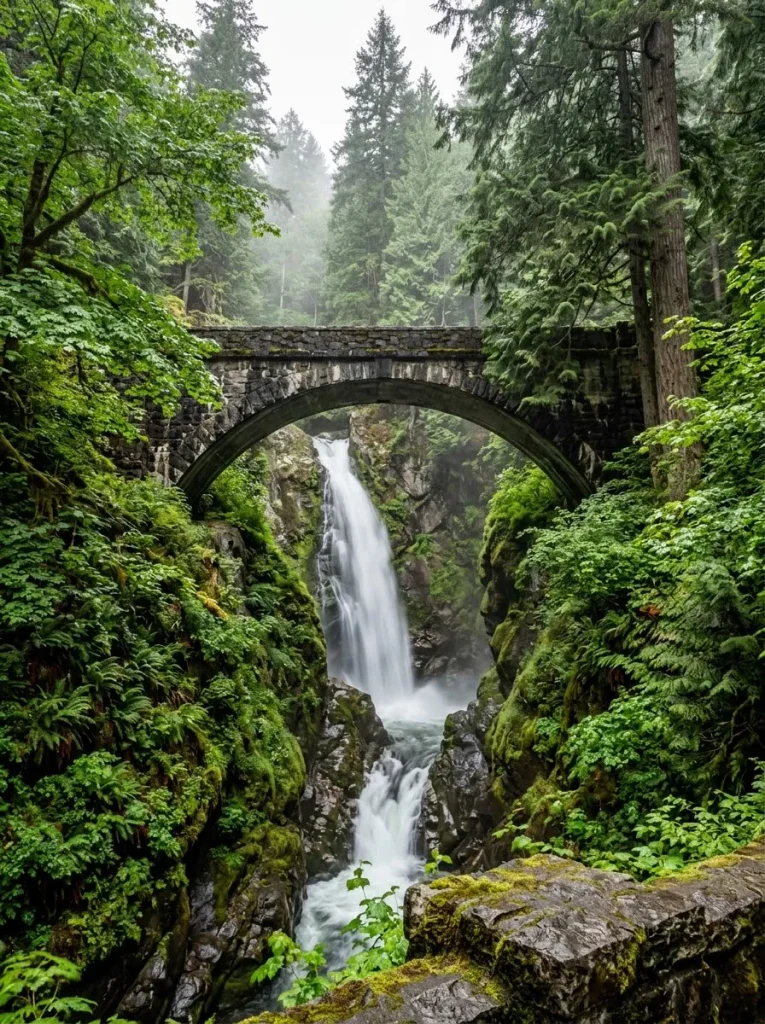
Christine Falls is a picturesque waterfall near the southwest side of the park. A historic stone bridge crosses above the falls, creating a distinctive composition for photography.
The roadside viewpoint makes this a convenient stop when traveling between Longmire and Paradise. You can often enjoy the scenery without dedicating a large part of your day to hiking.
Parking space is limited, so avoid stopping where it is unsafe or prohibited. If the designated area is full, continue to another stop and return only if conditions permit.
7. Sunrise
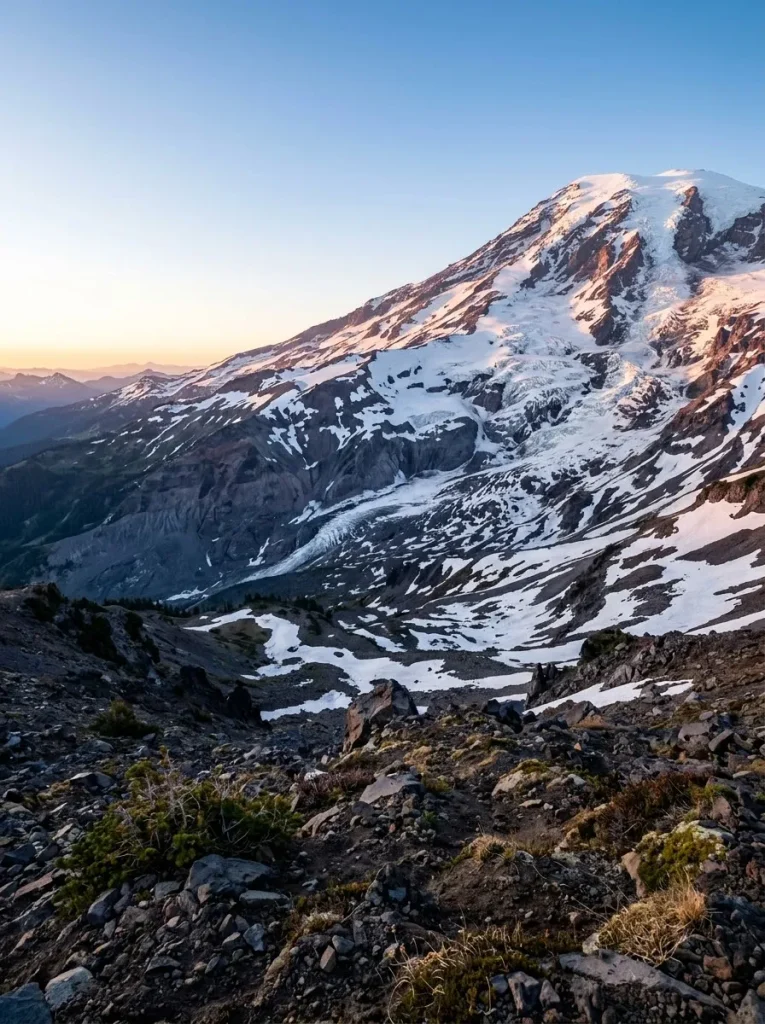
Sunrise is the highest point in the park generally accessible by vehicle when its road is open. On clear days, the area provides sweeping views of Mount Rainier and the surrounding mountain ranges.
It is also a popular starting point for high-elevation hikes. Routes in this region can offer close views of glaciers, rocky slopes, alpine meadows, and distant peaks.
Sunrise is typically a summer destination because the access road closes seasonally. Opening dates depend on snow removal and conditions, and unusual events can cause additional closures.
Do not build your itinerary around Sunrise without checking current road status. During closures, you cannot simply drive to the visitor center or trailhead and expect to find access.
8. Tipsoo Lake and the Naches Peak Area
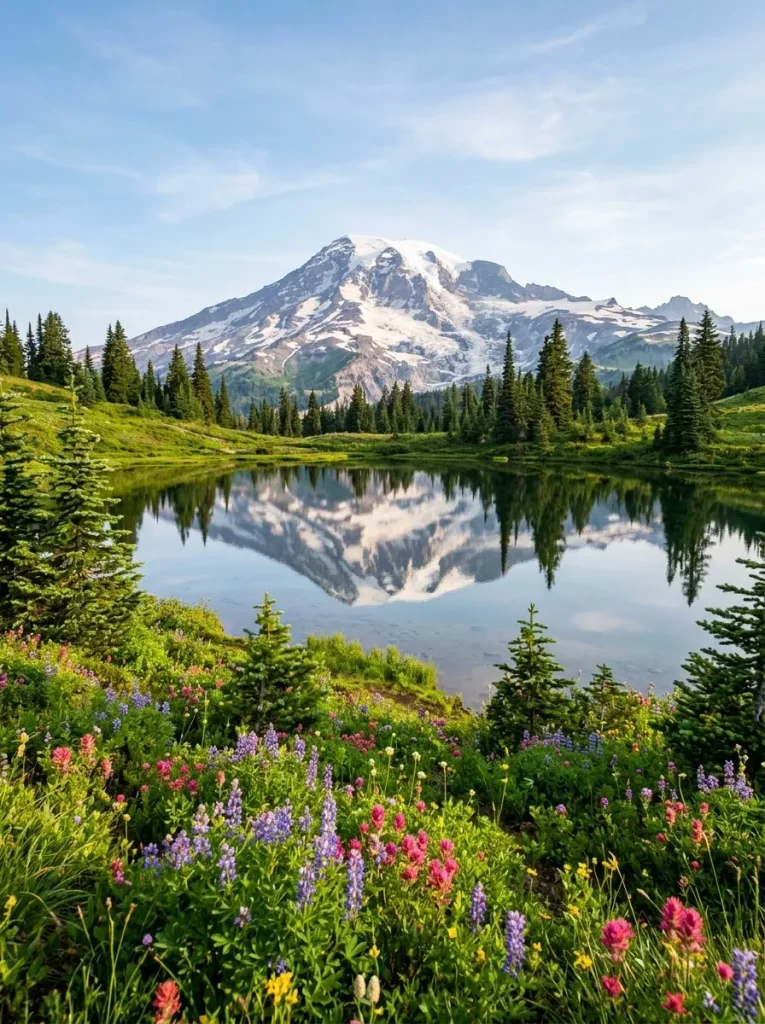
Tipsoo Lake is a small alpine lake near the eastern side of the park. When accessible, it is a lovely place for photography and a short walk, with mountain scenery and seasonal wildflowers.
The nearby Naches Peak Loop is a popular hiking option because it combines mountain views, forest sections, and open landscapes. The route is most commonly enjoyed during the summer and early autumn hiking season.
Trail conditions can change significantly with elevation. Snow may linger after lower areas have dried out, so check the current trail report before starting.
9. Ohanapecosh
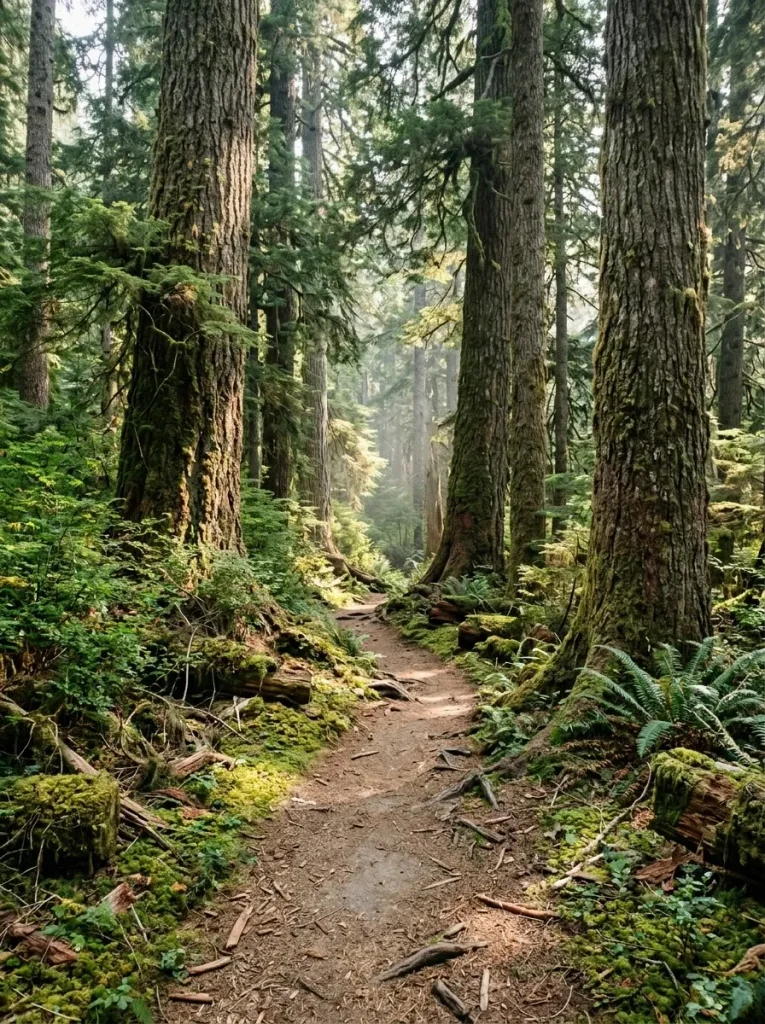
Ohanapecosh, in the southeastern part of the park, is known for its lush forest, rivers, and old-growth trees. It provides a different atmosphere from the exposed alpine landscape around Paradise and Sunrise.
The Ohanapecosh River runs through a forested valley, and the surrounding area offers opportunities to appreciate the park’s cooler, greener side.
Facilities and access are subject to seasonal operations and construction. The campground, visitor center, picnic area, and associated structures are closed during the 2026 rehabilitation project, which is scheduled to continue through November. Confirm the latest conditions before planning a stop.
10. Grove of the Patriarchs Area
The Grove of the Patriarchs has long been known for its towering old-growth trees, including massive western red cedars and Douglas firs. It has historically been a popular choice for visitors looking for an easy forest walk.
However, the trail and its parking area have been closed because of damage to the access bridge. Do not include this walk in your itinerary unless the National Park Service confirms that it has reopened.
If you want to experience the park’s forests, consider other currently accessible trails instead. Always verify the latest trail conditions rather than relying on older travel guides.
11. Mowich Lake
Mowich Lake is a remote destination in the northwest part of the park, known for its clear water and mountain setting. It can be an appealing choice for visitors who want to explore beyond the busiest southern destinations.
Access is highly seasonal, and the approach road is rough in places. The area also has limited facilities compared with Paradise.
There is currently a major access limitation: the closure of the Fairfax Bridge on State Route 165 has prevented public access to Carbon River and Mowich Lake by the usual route. Check for official updates before considering this destination, and do not assume that a mapped route is passable.
12. The Wonderland Trail
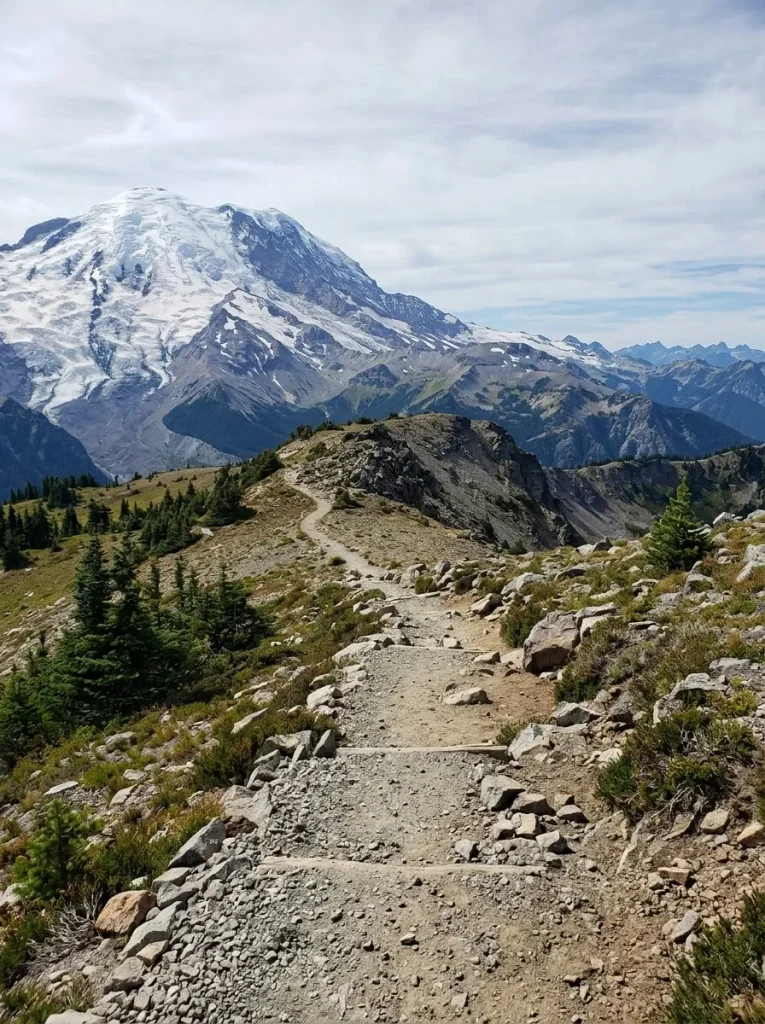
The Wonderland Trail is a long-distance hiking route that circles Mount Rainier. It covers roughly 93 miles and passes through a remarkable variety of landscapes, including forests, rivers, meadows, and high mountain terrain.
This is not a casual day hike. Completing the full route requires careful planning, physical preparation, overnight gear, and wilderness camping permits.
Trail closures can also affect whether the entire circuit is possible. Visitors planning a backpacking trip should check current restrictions, campsite availability, weather, and river crossings well in advance.
You can still appreciate the Wonderland Trail’s scenery through shorter hikes that follow portions of its route, provided those sections are open.
The Perfect One-Day Mount Rainier National Park Itinerary
If you have only one day, focus on the southwest side of the park. Paradise, Longmire, and nearby waterfalls create a rewarding route without requiring a long drive between distant regions.
This itinerary assumes that the roads and stops listed are open. Adjust the order according to weather, parking, and current conditions.
7:00 AM: Enter Through the Nisqually Entrance
Start early from the Ashford area or another nearby base. An early arrival can improve your chances of finding parking at Paradise and gives you more time to enjoy the mountain before afternoon clouds develop.
Keep water, snacks, warm layers, and a downloaded map within easy reach. Mobile service is unreliable in many parts of the park.
8:00 AM: Stop at Christine Falls
If the viewpoint is accessible, pause at Christine Falls on the drive toward Paradise. Take a few photographs and enjoy the waterfall framed by the historic bridge.
Keep this stop brief so you have enough time for the main attraction of the day.
8:30 AM: Explore Paradise
Spend the morning exploring Paradise. Visit the Henry M. Jackson Memorial Visitor Center if it is open, check the latest trail information, and choose a route suited to the conditions.
For a relaxed visit, walk around the Paradise meadows and enjoy the views from accessible paths. If you are a fit hiker and the trail is clear and safe, consider a longer route such as the Skyline Trail.
Do not force a high-elevation hike if snow, poor visibility, or unstable weather makes it unsafe. The scenery around Paradise can be rewarding even when you stay on shorter trails.
11:30 AM: Have Lunch
Bring a packed lunch or use an available food service if one is operating. Dining options inside the park can be limited or seasonal, and services may close outside the main summer period.
Choose a designated picnic area when available. Pack out all food waste and rubbish, and never feed wildlife.
12:30 PM: Visit Myrtle Falls
If the trail is open and conditions are suitable, walk to Myrtle Falls. Allow time for photographs and a relaxed return.
The route may be icy or snowy outside the summer season. If the trail is not safe, choose an accessible viewpoint or another open path around Paradise.
2:00 PM: Drive Toward Narada Falls
Head back toward Narada Falls for another look at the park’s waterfall scenery. Use the designated viewpoint and avoid the lower trail if it is slippery or closed.
3:00 PM: Explore Longmire
Continue to Longmire for a short walk through the historic district. If the museum is open, spend some time learning about the park’s early history.
This is a good place to finish your main sightseeing before returning toward the entrance.
4:00 PM: Begin Your Return Journey
Leave enough daylight for the drive back. If you have extra time and the road is open, you can add another short stop along the way.
Avoid trying to squeeze in a distant destination such as Sunrise after spending the day around Paradise. Driving between the park’s regions takes time, and combining them into one day can leave you rushing rather than enjoying the scenery.
A Relaxed Three-Day Mount Rainier Itinerary
Three days give you more flexibility and allow you to explore different landscapes. This plan should be adjusted to current access conditions, especially because seasonal and emergency closures can affect entire regions.
Day 1: Paradise and Longmire
Dedicate the first day to the park’s southwest side.
Start at Paradise and spend the morning hiking or exploring accessible viewpoints. Choose Myrtle Falls or a section of the Paradise trail network based on your energy and the weather.
In the afternoon, stop at Narada Falls and Christine Falls, then continue to Longmire. Explore the historic district before heading to your accommodation.
If you are visiting during winter or late autumn, keep the schedule flexible. Short daylight hours, snow, and nightly road closures can limit how much you can do.
Day 2: Sunrise and the Northeast Side
When Sunrise Road is open to vehicles, spend the second day exploring the northeastern side of the park.
Arrive early, visit the Sunrise area, and choose a hike that matches your fitness and the conditions. Shorter walks can provide excellent views, while longer routes offer a more demanding alpine experience.
If the road is closed, do not attempt to substitute a long detour without checking travel times and access restrictions. Choose an open destination instead, or spend additional time in the Paradise and Longmire areas.
Sunrise is especially rewarding on clear days, but clouds can move in quickly. Bring warm clothing even if the weather is sunny when you leave your accommodation.
Day 3: Choose a Forest or Waterfall Day
Use the final day to explore another accessible region or revisit a favorite destination.
If Ohanapecosh and its surrounding facilities are open during your visit, the area offers a greener, forest-focused experience. If facilities remain closed for construction, verify which roads, trailheads, and viewpoints are available before setting out.
Another option is to spend more time around Longmire and Paradise, exploring a different trail or returning to a viewpoint when the light is better.
You do not need to cover every corner of the park to have a memorable trip. A slower itinerary often leaves more time for photography, wildlife observation, and enjoying the landscape without watching the clock.
Best Hikes in Mount Rainier National Park
Hiking is one of the best ways to experience Mount Rainier, but you do not need to tackle a difficult summit route to enjoy the park. There are options for casual walkers, families, and experienced hikers.
Trail conditions vary by season, and a route’s difficulty can change dramatically when snow covers the path.
Skyline Trail
The Skyline Trail near Paradise is one of the park’s signature hikes. It climbs through alpine terrain with expansive views of Mount Rainier, surrounding ridges, and glaciers on clear days.
The full loop is a demanding hike for many casual visitors, particularly at high elevation. Snow and ice can remain on portions of the route well into summer, so check conditions before setting out.
Allow several hours for the hike, depending on your chosen route, pace, and trail conditions. Bring enough water, food, and warm clothing, even when the weather seems pleasant at the trailhead.
Naches Peak Loop
The Naches Peak Loop is a popular option for hikers looking for a manageable mountain walk with excellent scenery. The route passes through forest and open areas with views of Mount Rainier and nearby peaks.
It is especially attractive during the summer wildflower season and early autumn, when conditions allow access.
The trail is not suitable for every visitor at every time of year. Snow, muddy sections, and changing weather can make it more challenging than expected.
Bench and Snow Lakes Trail
This hike near the Paradise area offers access to small mountain lakes and forest scenery. It is a good option for visitors who want something different from the broad alpine views around Paradise itself.
The trail has elevation changes and can be slippery in wet weather. Check the latest conditions and allow sufficient time for the return journey.
Comet Falls Trail
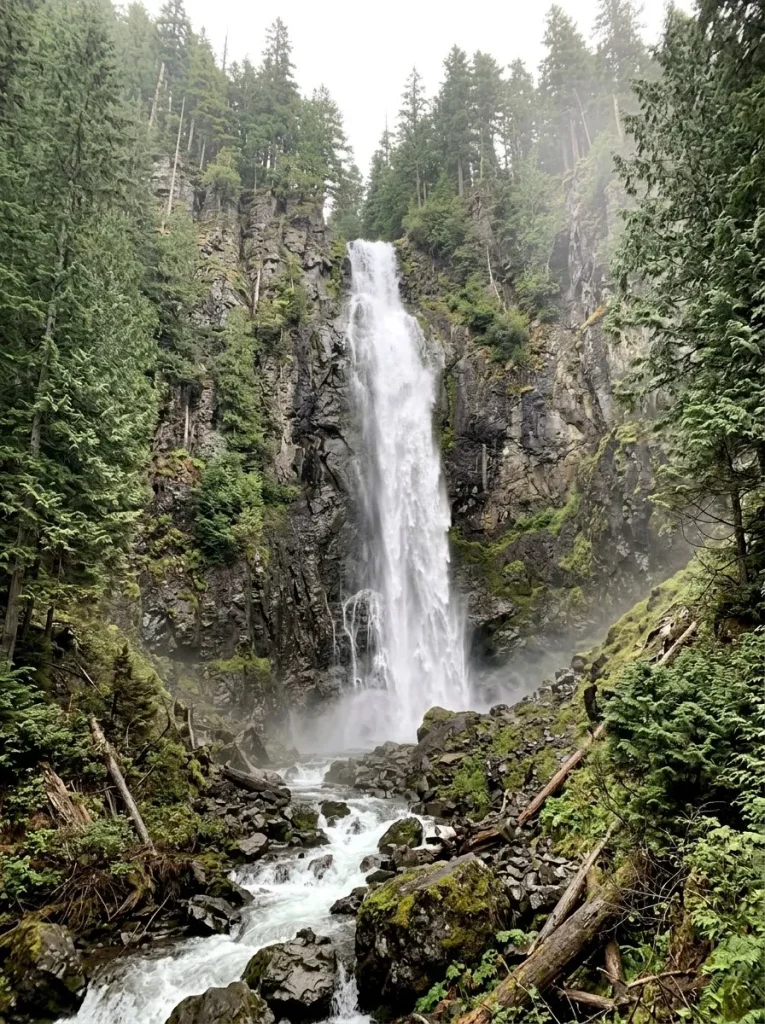
Comet Falls is a rewarding waterfall hike in the Longmire area. The trail climbs through forest toward a tall waterfall surrounded by steep, rugged terrain.
Expect a more strenuous walk than a simple roadside viewpoint. Wet roots, rocks, and muddy sections can make the path difficult, particularly after rain.
Do not attempt the hike if the trail is closed or conditions are beyond your experience.
Grove of the Patriarchs Alternative
Because the Grove of the Patriarchs Trail is closed due to bridge damage, visitors should not count on this historic route being available. Instead, look for an open forest trail in the region you are visiting.
Check the current park trail report before choosing an alternative. Even familiar routes can close because of storm damage, construction, or safety concerns.
How Much Time Do You Need at Mount Rainier?
The ideal length of your visit depends on whether you want a few scenic stops or a fuller hiking experience.
| Time available | Best approach |
| Half a day | Focus on Paradise or another accessible region close to your entrance |
| One full day | Explore Paradise, visit nearby waterfalls, and stop at Longmire |
| Two days | Spend one day around Paradise and Longmire, then explore another accessible region |
| Three days | Add more hiking and explore different landscapes, depending on road access |
| Four days or more | Enjoy a slower trip with longer hikes, changing weather flexibility, and time for photography |
If this is your first visit, one full day can provide a memorable introduction. Two or three days are better if you want to hike and experience more than one part of the park.
Remember that the regions are spread out. Two attractions may look close on a map but require a substantial drive between them.
Where to Stay Near Mount Rainier National Park
Choosing accommodation near the right entrance can save considerable driving time.
Ashford
Ashford is one of the most convenient bases for exploring the southwest entrance, Paradise, and Longmire. It offers access to cabins, lodges, vacation rentals, and other lodging options.
This is a practical choice for a one-day itinerary focused on Paradise. Staying nearby also makes an early start easier.
Book ahead during the summer months, especially if you plan to visit on a weekend.
Packwood
Packwood is a useful base for visitors approaching from the southeast. It has accommodation options and services for travelers exploring the surrounding mountains.
However, do not choose Packwood solely because you want to visit a particular eastern or northeastern destination. Confirm that your intended roads are open and that the driving route makes sense for your dates.
Near Seattle or Tacoma
Staying in Seattle or Tacoma works if you are combining Mount Rainier with a wider Washington State trip. However, a day trip from these cities involves a considerable amount of driving.
If possible, spend a night closer to the park before your visit. This allows you to arrive early and spend more of the day enjoying the scenery rather than sitting in traffic.
Camping Inside the Park
Camping can be an excellent way to spend more time outdoors, but campground availability is seasonal. Reservations may be necessary, and facilities can close for construction or winter.
For 2026, Ohanapecosh Campground is closed for rehabilitation. Other campgrounds also operate seasonally, so check current availability before building your itinerary around an overnight stay.
Backcountry camping requires a wilderness camping permit. Do not assume you can simply choose a campsite and pitch a tent anywhere in the park.
How Much Does It Cost to Visit Mount Rainier National Park?
Mount Rainier charges an entrance fee, and the exact pass you need depends on how you arrive and how frequently you visit national parks.
A standard private-vehicle pass is listed at $30 and covers the vehicle and its passengers for seven consecutive days. Other pass options are available for visitors arriving by other means or those who qualify for an annual or lifetime pass.
Bring a payment card or another accepted electronic payment method because the park operates cashless at entrance stations.
For 2026, timed-entry reservations are not required anywhere in Mount Rainier National Park. However, this does not mean parking is guaranteed. Popular lots can fill early, and temporary road restrictions or closures can affect access.
Check the latest entrance fees before traveling because prices and policies may change.
What to Pack for Mount Rainier National Park
Weather in the mountains can change quickly, even during summer. A sunny morning does not guarantee a warm afternoon, and conditions at higher elevations can be very different from those in nearby towns.
Use this checklist to prepare for your visit.
- Comfortable hiking shoes or boots with good traction
- Waterproof jacket and warm layers
- Daypack for food, water, and extra clothing
- Reusable water bottles or a hydration system
- Packed lunch and snacks
- Sun protection, including sunscreen, sunglasses, and a hat
- Paper map or downloaded offline navigation
- Fully charged phone and portable power bank
- First-aid supplies
- Headlamp or flashlight
- Binoculars or a camera
- Extra socks, especially for wet or snowy conditions
For longer hikes, carry the essential emergency supplies recommended by the National Park Service. These include navigation tools, extra food and water, warm clothing, a light source, first-aid supplies, and emergency shelter.
Do not rely on mobile service for navigation or emergencies. Coverage is limited across much of the park.
Essential Tips for Visiting Mount Rainier National Park
Check Road and Trail Conditions Before Leaving
This is the most important planning step. Snow, storms, wildfire activity, construction, and damaged infrastructure can affect roads and trails.
Check official alerts on the day of your visit, especially if your itinerary includes Sunrise, Ohanapecosh, Mowich Lake, or a high-elevation hike.
A destination being listed in a guidebook does not mean it is currently accessible.
Arrive Early
Paradise and other popular areas can become crowded during summer weekends and holidays. Early arrivals generally have more time to explore and a better chance of finding parking.
If the main lot is full, follow parking instructions and do not block roads or park in unauthorized spaces.
Bring Your Own Food and Water
Food services and visitor facilities are limited compared with those in a city or large resort. Operating hours also change with the season.
Pack enough food and water for your planned activities, and carry extra supplies in case you are delayed.
Stay on Designated Trails
Mount Rainier’s meadows and other fragile habitats can be damaged by footsteps. Stay on established trails and designated paths, even when the ground looks muddy or a shortcut appears tempting.
Do not walk through wildflower meadows to take photographs. The plants and soil can take a long time to recover from repeated trampling.
Keep a Safe Distance From Wildlife
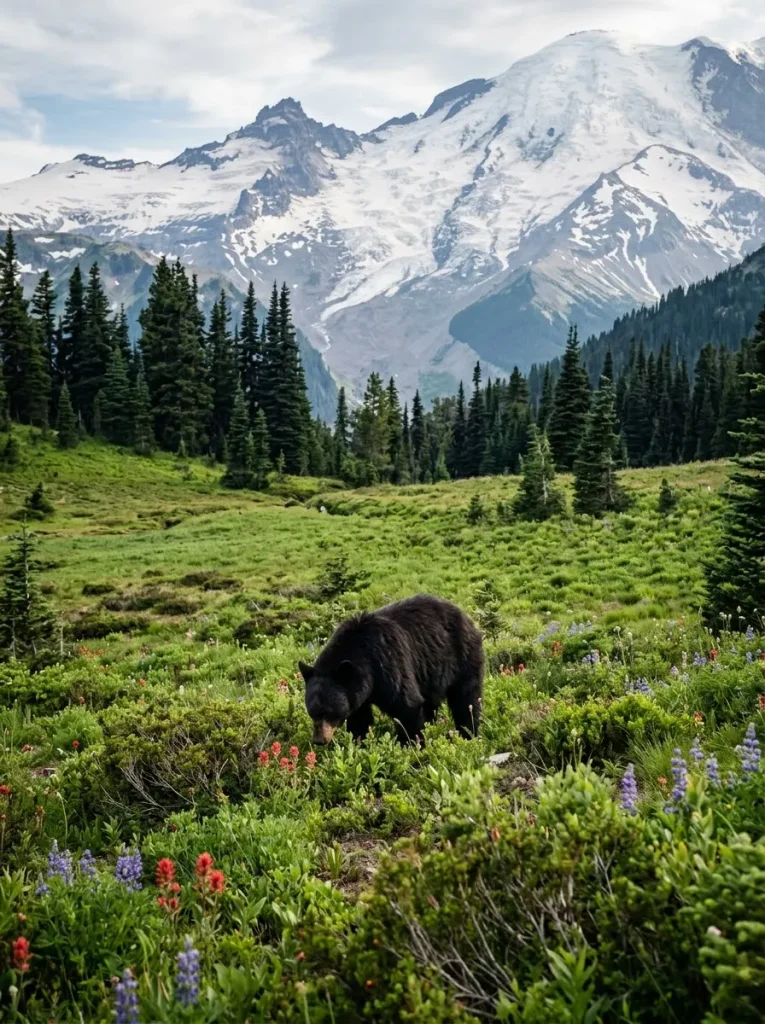
The park is home to black bears, deer, marmots, mountain goats, and other wildlife. Seeing an animal can be an exciting part of your visit, but never approach it or offer food.
Maintain at least 50 yards of distance from wildlife, and give larger animals additional space when necessary. Use a camera zoom rather than moving closer for a photograph.
Prepare for Changing Weather
Mountain weather can shift rapidly. Clouds can reduce visibility, temperatures can drop, and rain or snow may arrive unexpectedly.
Check the forecast before hiking and be prepared to turn around if conditions deteriorate. Reaching a viewpoint is never more important than returning safely.
Protect Your Belongings
Avoid leaving bags, electronics, wallets, or other valuables visible in your parked vehicle. Store belongings securely before arriving at trailheads and parking areas.
Keep food and rubbish properly secured, and follow all park instructions for wildlife-safe storage.
Understand the Difference Between Hiking and Climbing
Hiking to a viewpoint and climbing Mount Rainier are very different activities. The mountain’s summit requires specialized preparation, technical equipment, and appropriate training. It is not an extension of an ordinary day hike.
If your goal is to climb the mountain, research the specific requirements and hazards rather than relying on a general sightseeing itinerary.
Is Mount Rainier National Park Worth Visiting?
Absolutely. Mount Rainier National Park offers an impressive variety of landscapes within one destination. You can admire waterfalls, walk through evergreen forests, photograph alpine lakes, explore historic sites, and hike through meadows beneath a massive volcanic peak.
The park also rewards thoughtful planning. A visitor who focuses on one region may enjoy a much more relaxed day than someone attempting to drive between every famous attraction.
For a first visit, Paradise is an excellent starting point when accessible. Add Longmire and nearby waterfalls to create a satisfying one-day trip, or stay for several days if you want to explore additional regions and take longer hikes.
Before traveling, confirm which roads, trails, visitor facilities, and campgrounds are open. Conditions can change quickly, and some destinations may remain inaccessible because of seasonal weather, construction, or emergency closures.
With a flexible schedule, suitable clothing, and realistic expectations, Mount Rainier National Park can be one of the highlights of a Washington State trip. Give yourself time to enjoy the views, respect the fragile environment, and remember that the best itinerary is the one that matches the conditions on the day you visit.